Quick Start Guide
In This Guide
1 Looking Up Inventory & Pricing 2 Writing Up a Quote / Order 3 Converting a Quote to an Order 4 Request Product & Schedule Delivery 5 Taking Payment 6 Checking Delivery AvailabilityLooking Up Inventory & Pricing
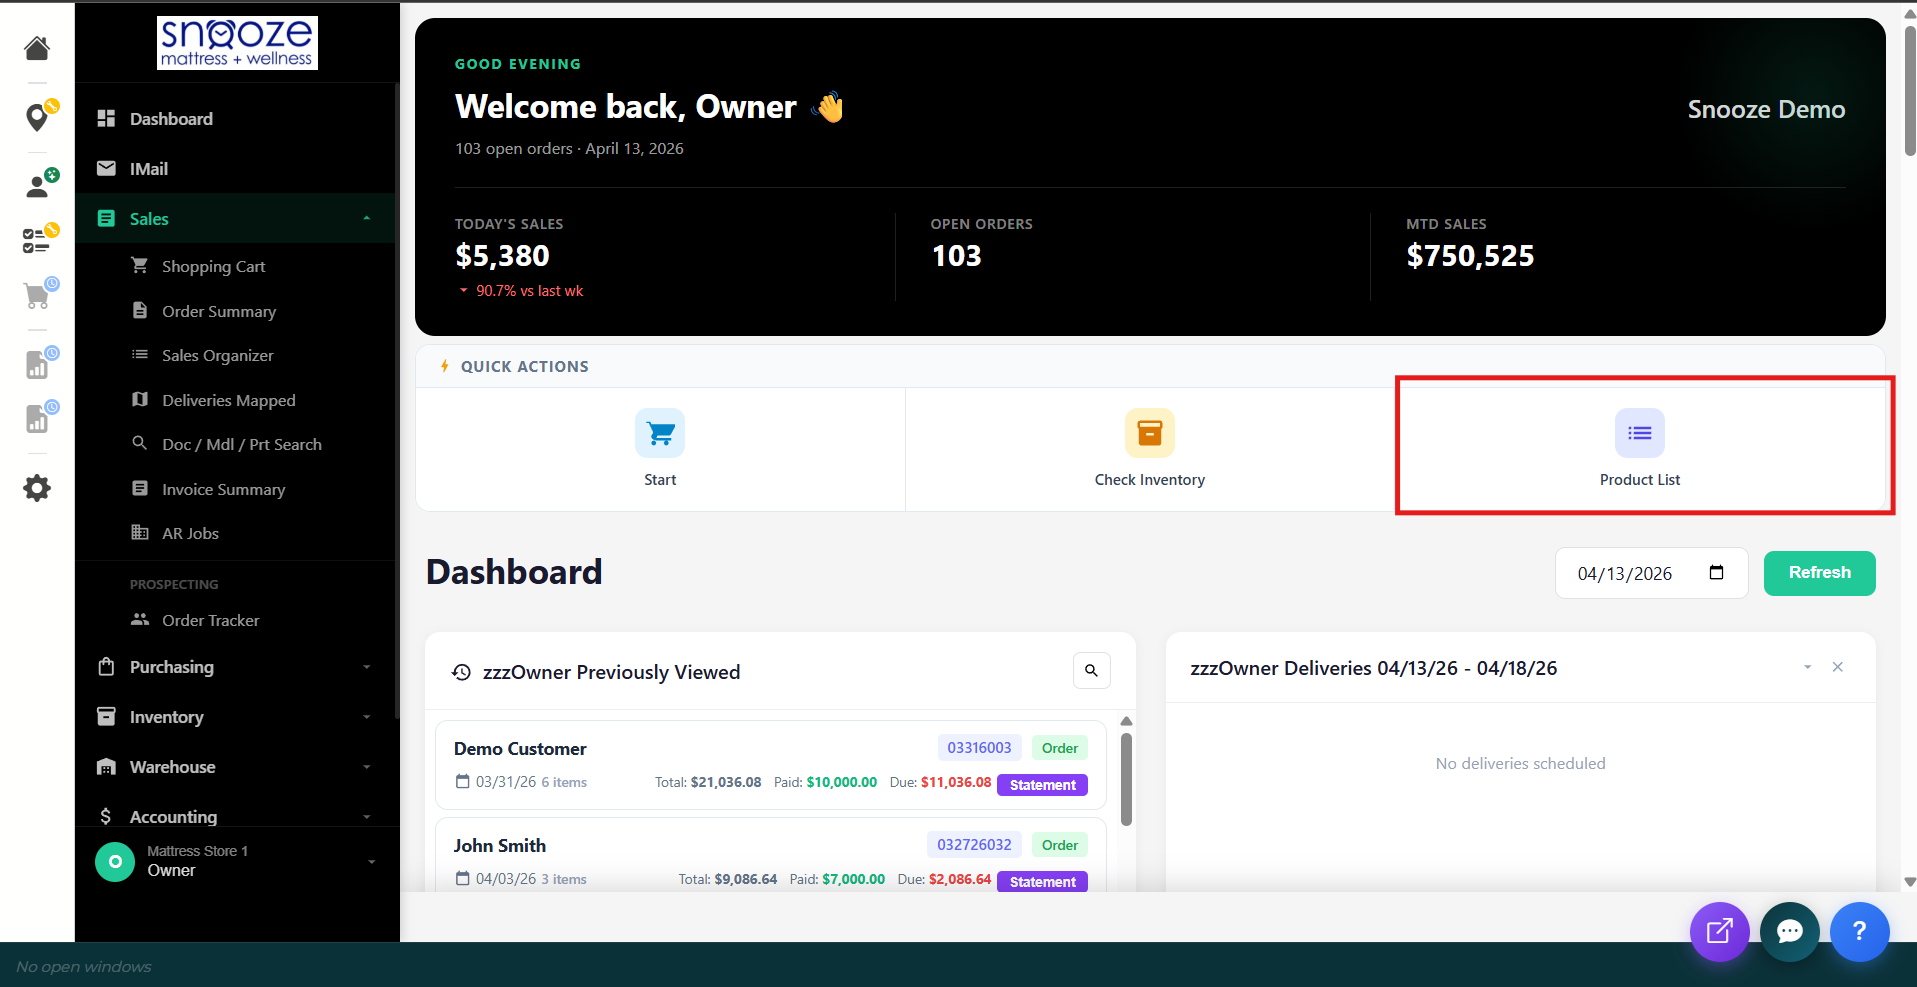
Open the Product List
From the Dashboard, find the Quick Actions bar and click Product List. This opens the product search screen where you can look up any product with pricing and inventory details across all locations.
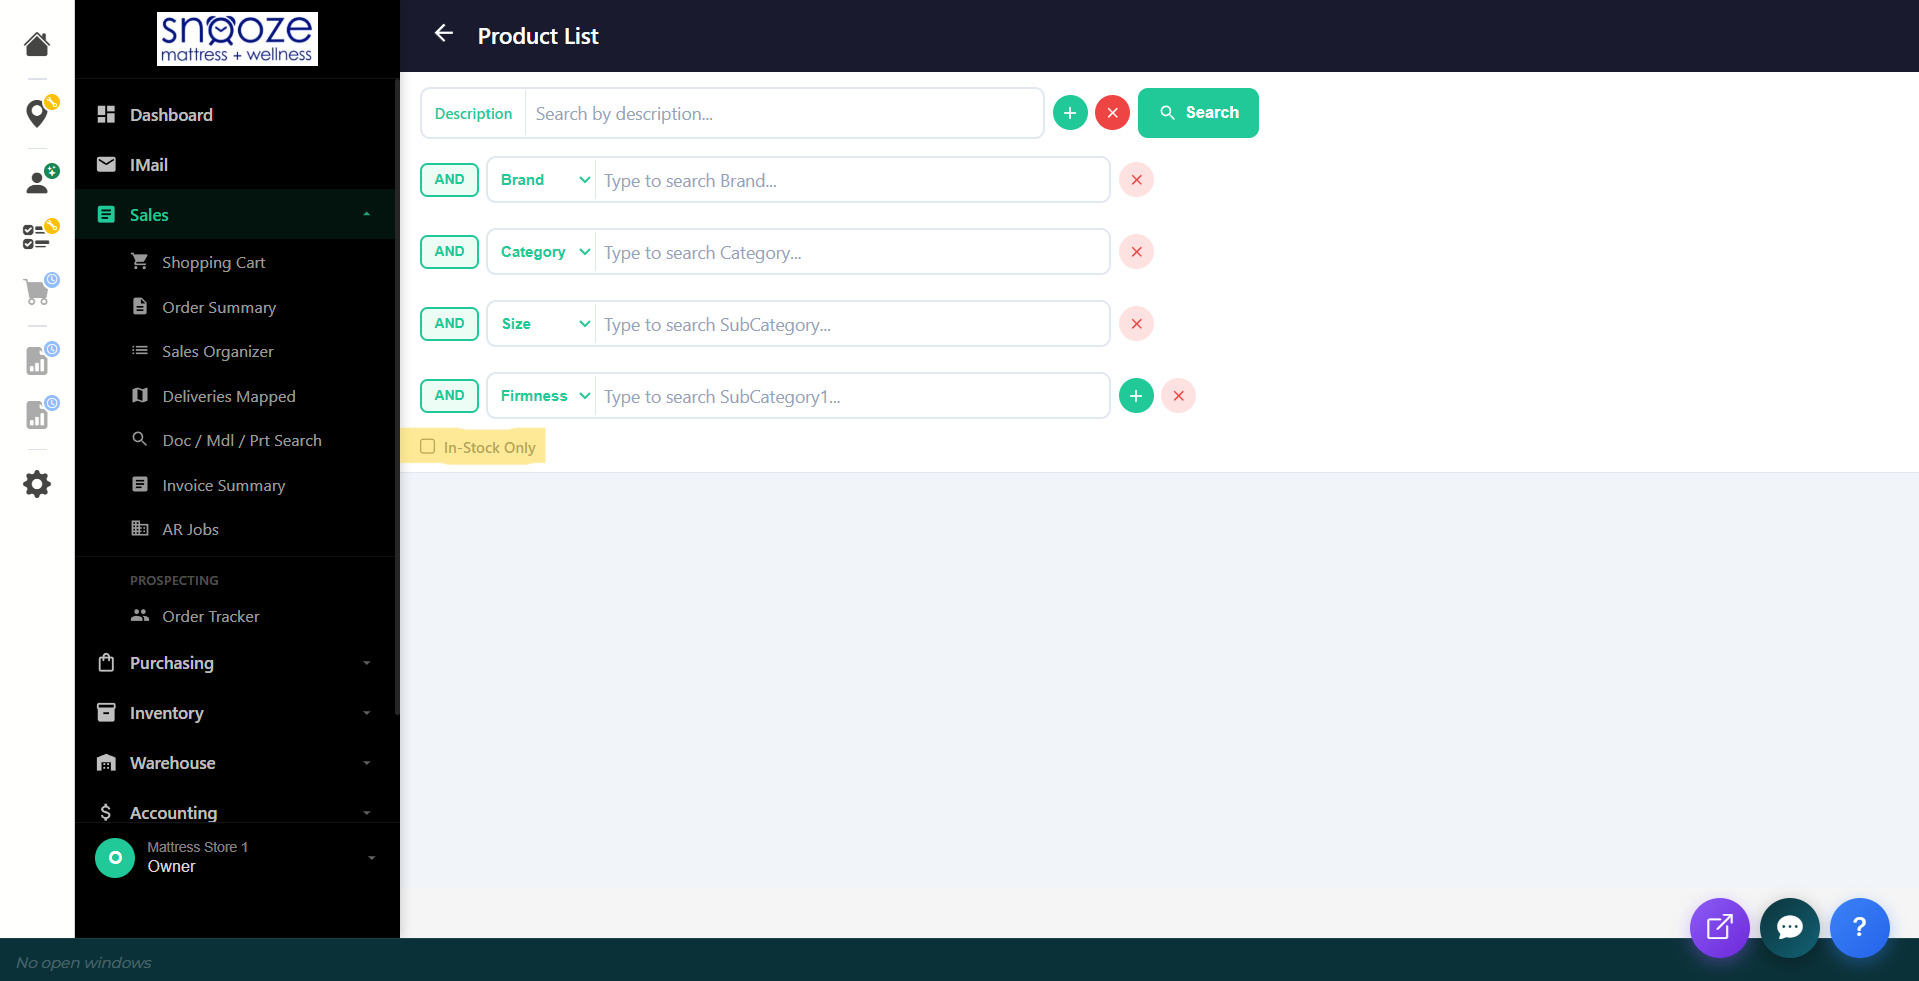
Search by Brand, Category, or Size
Use the filter dropdowns at the top to narrow your search: Brand, Category (e.g., Mattress, Adjustable Base), Size, and Firmness. You can also type a model name or SKU directly into the search field.
Read the Results
Results show each matching product as a card with the product name, brand, and SKU. The number on the right shows quantity in stock at your location.
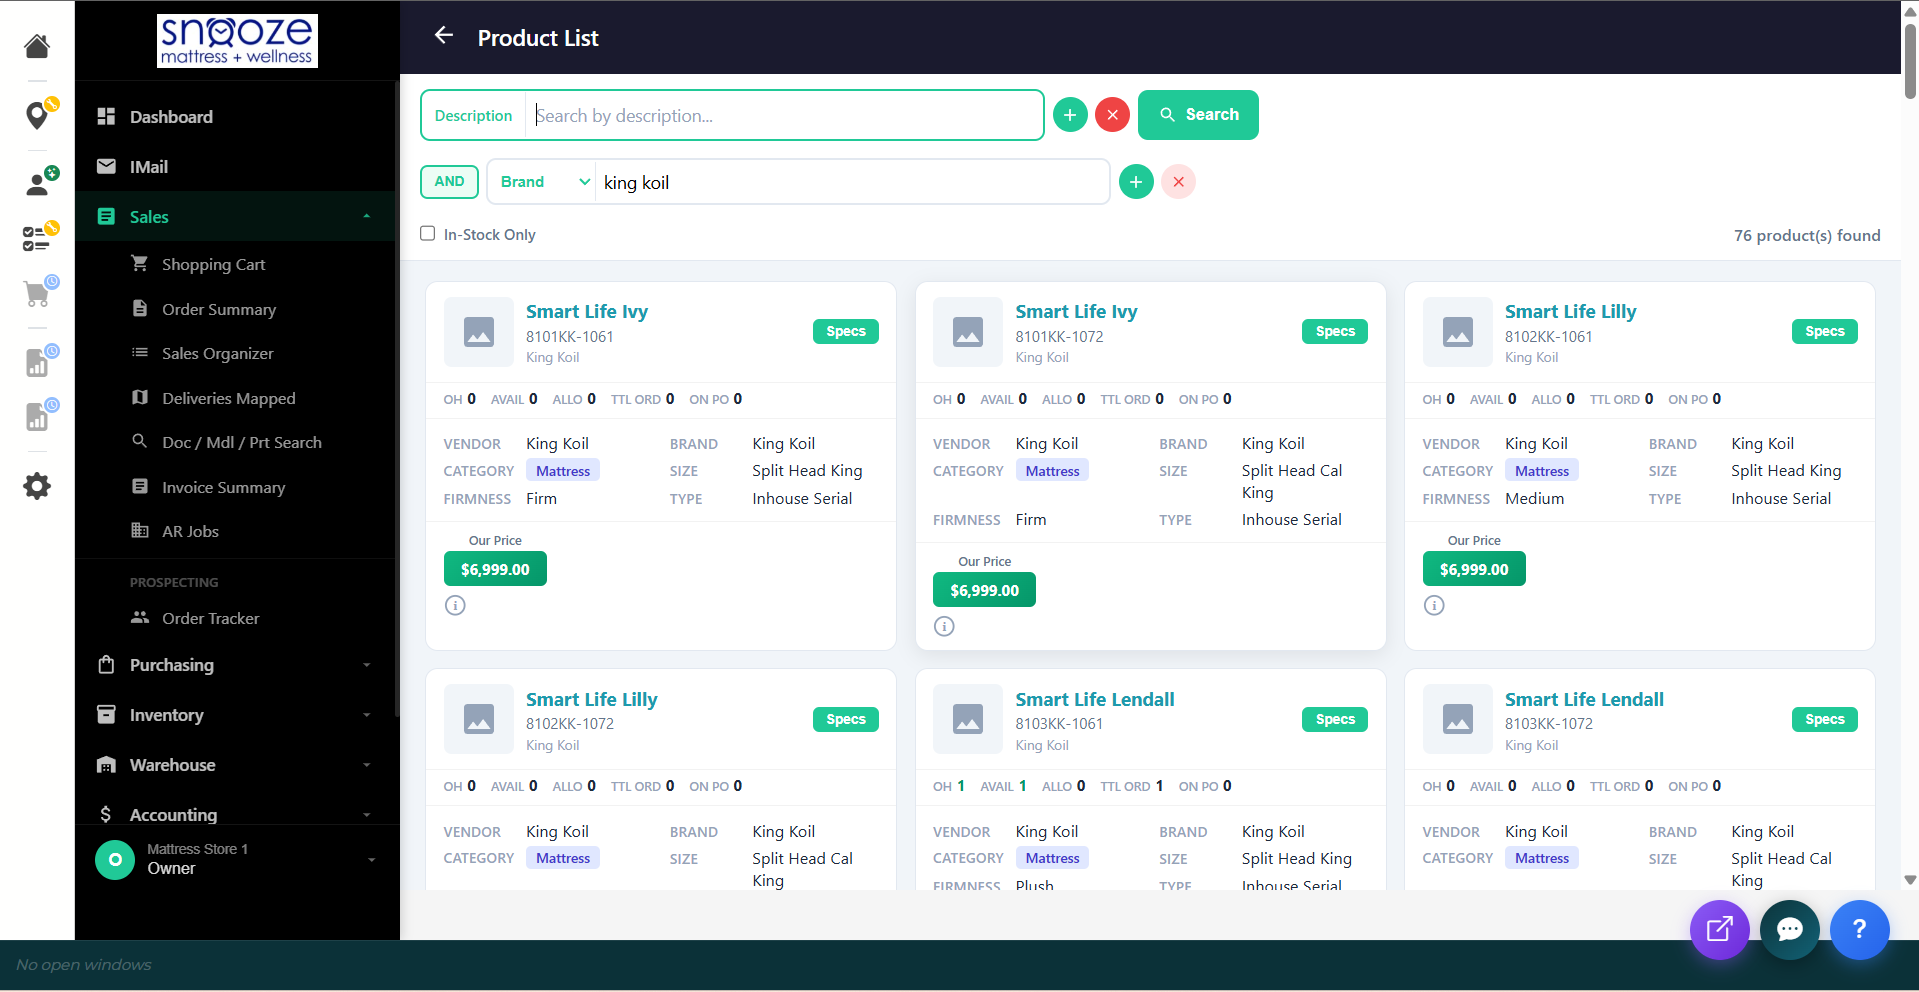
Open Product Specs
Click the green Specs button on any product card. The Product Specifications popup shows the full product name, SKU, brand, product type, color, and status.

Review Pricing
If more than one price is set up for the product you will see it in the search results screen on each model card.

Writing Up a Quote / Order
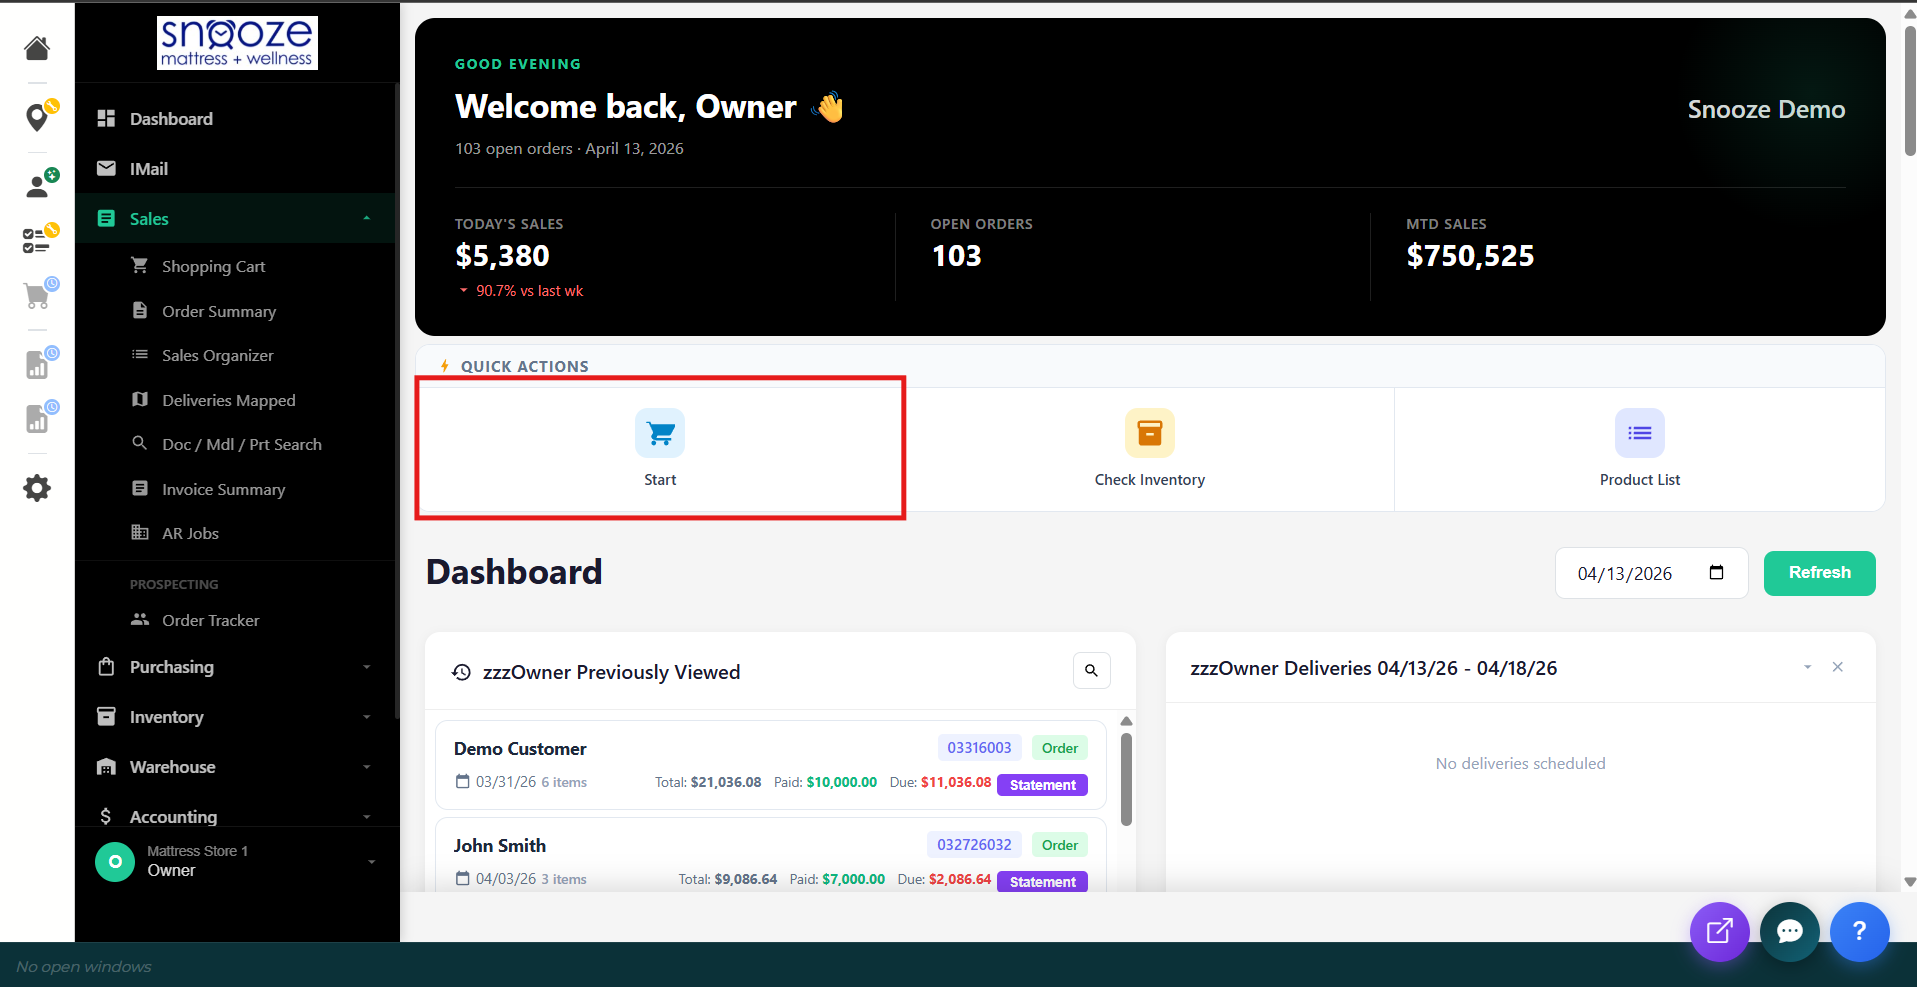
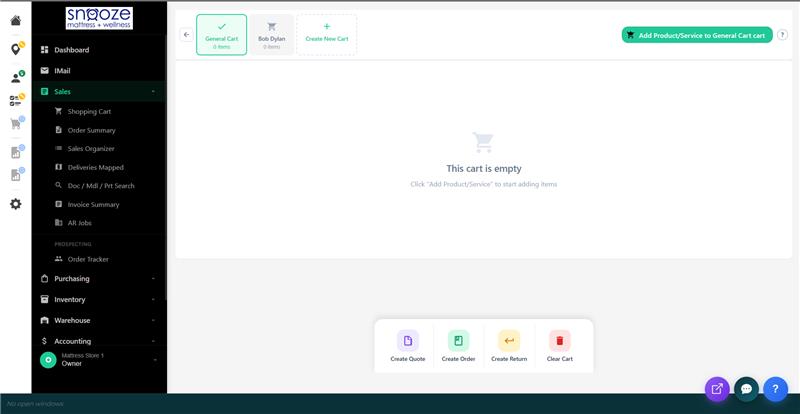
Open the Shopping Cart
Click Sales → Shopping Cart (or use the Start quick action on the Dashboard). A new cart tab opens.
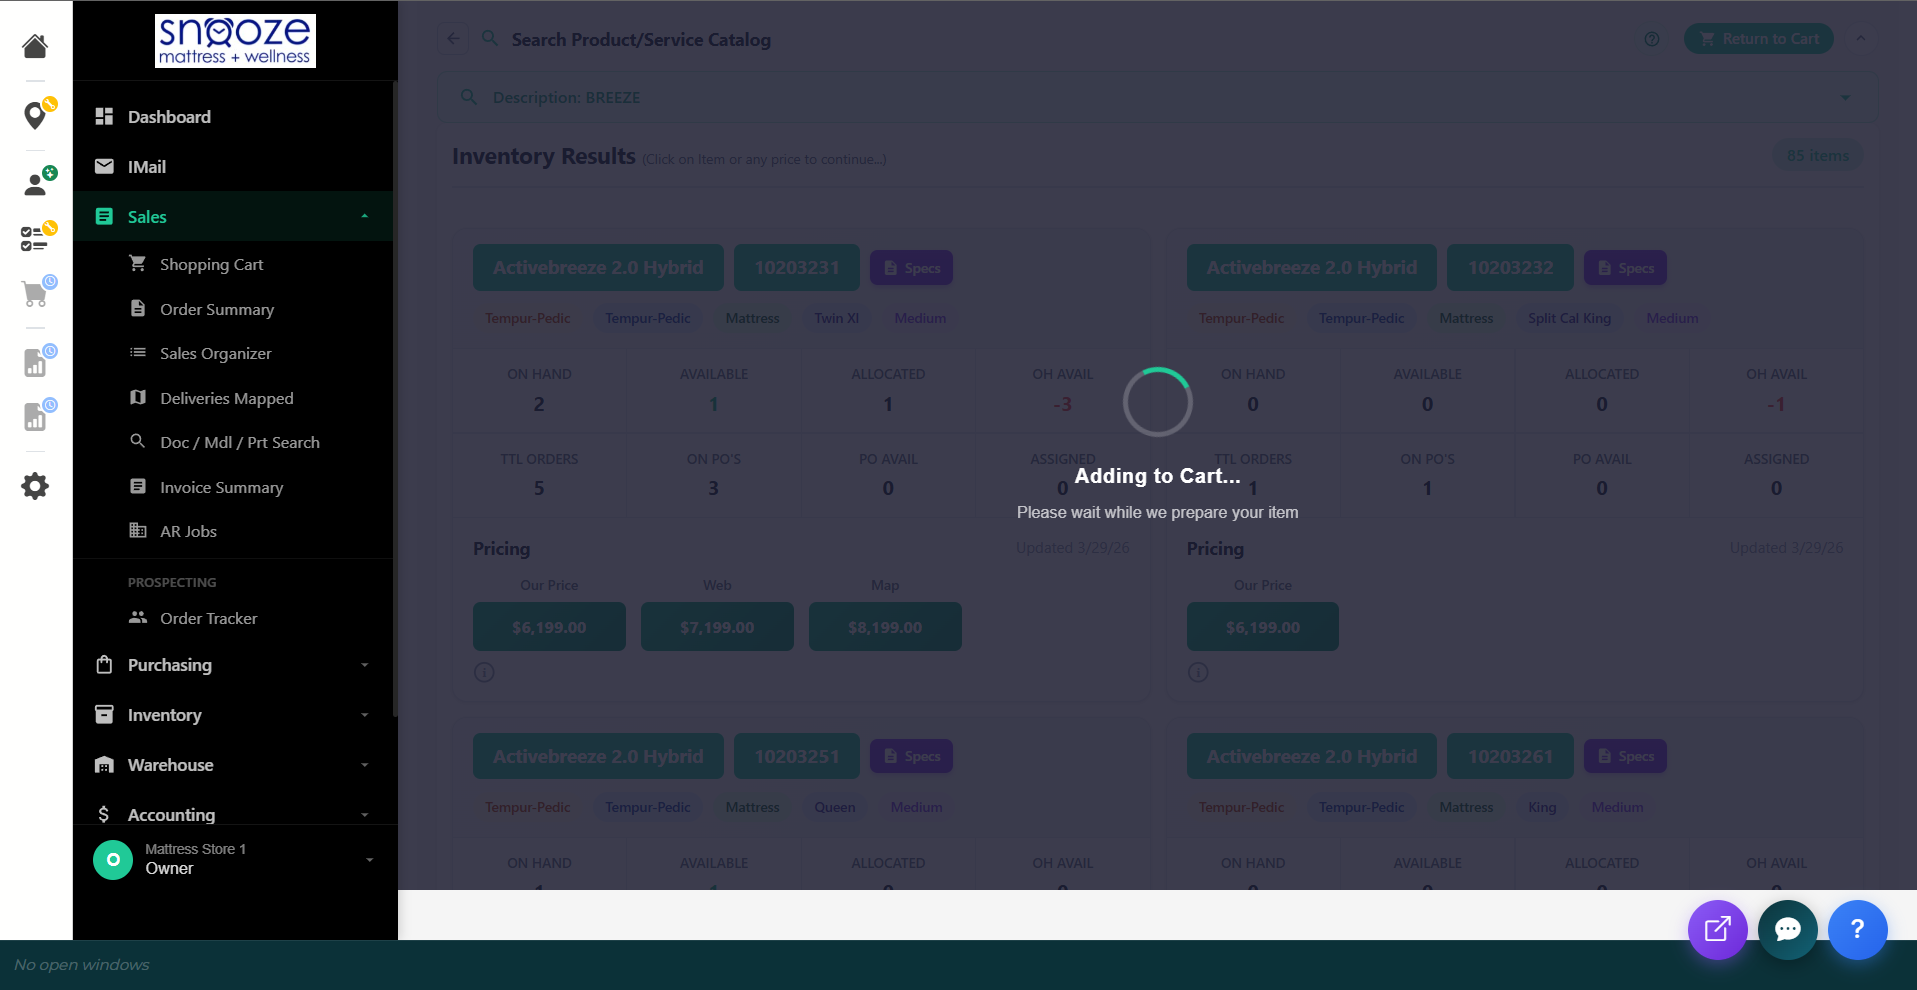
Add Products
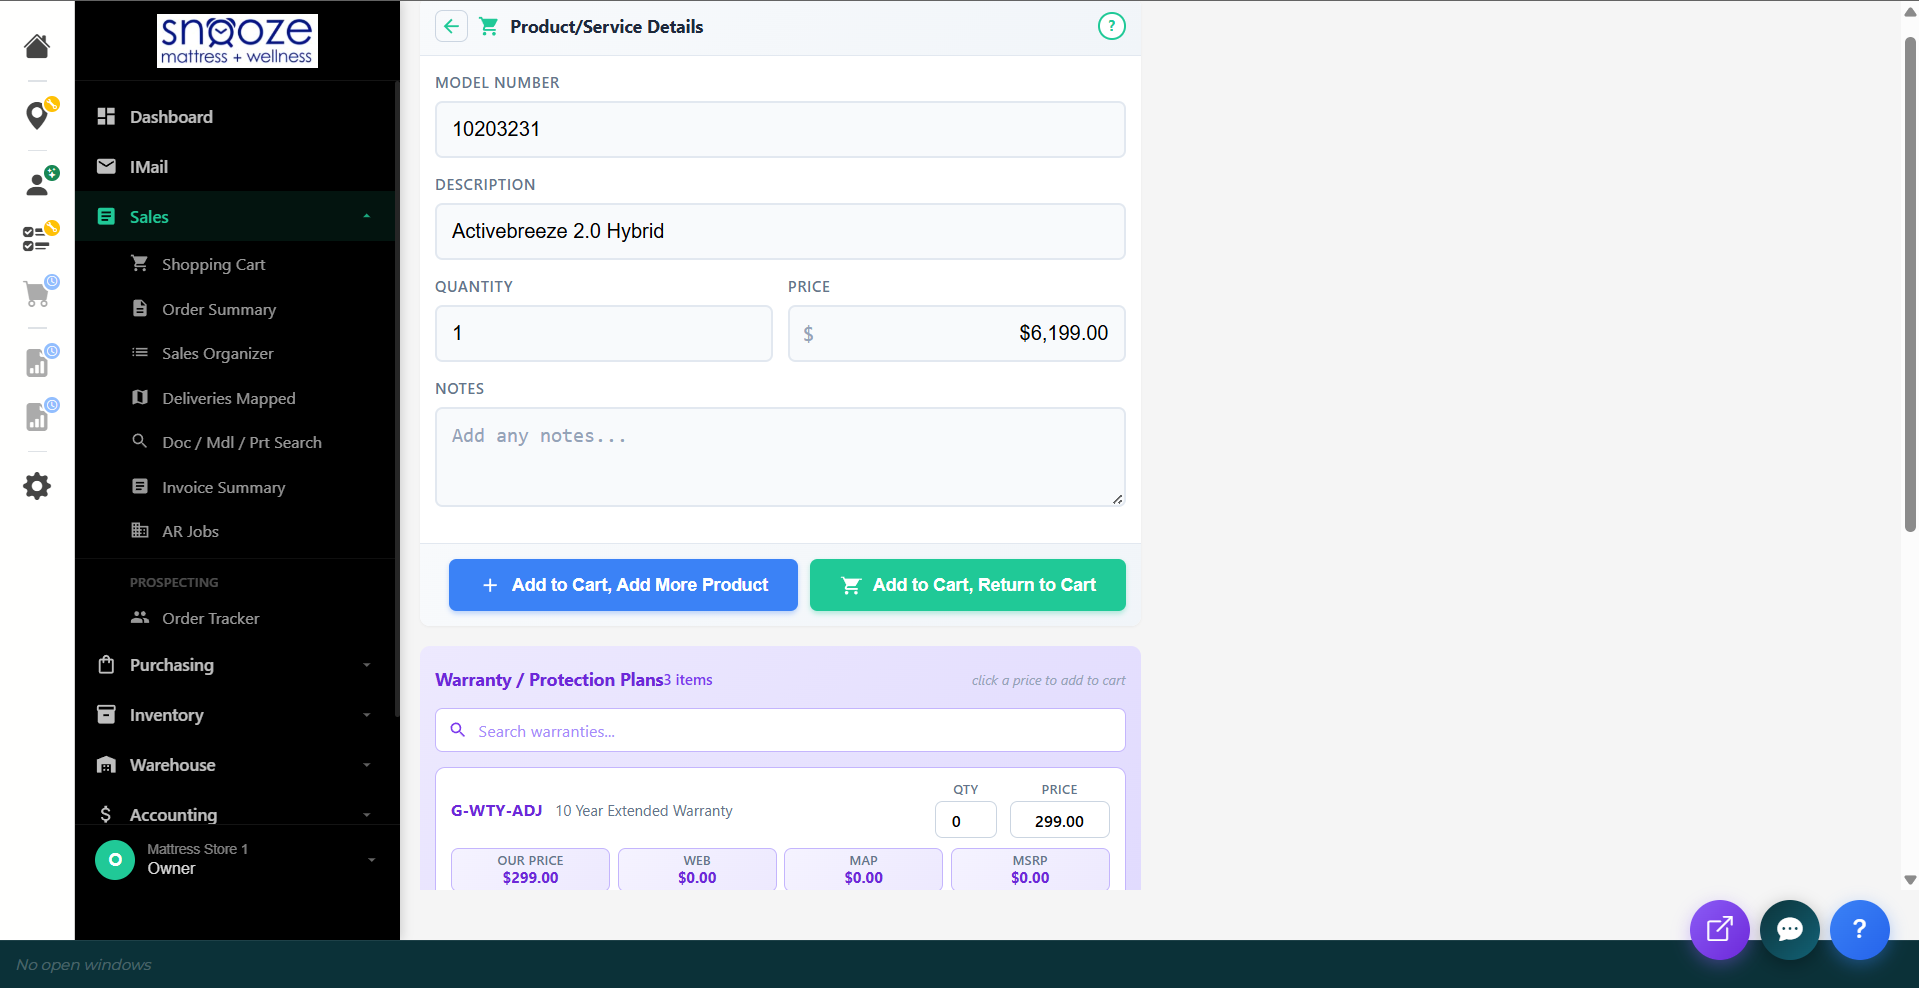
Click Add Product/Service to Cart. Use the filters (Brand, Category, Size, Firmness) to find the item and review results. Click on either the model number or the price chosen, and this will begin the process of adding the item to the cart. Set the quantity and price, then click Add to Cart.

Add Accessories
After adding the main product, the system shows recommended accessories (e.g., pillows, protectors, warranties). Review these with the customer and add any they want.
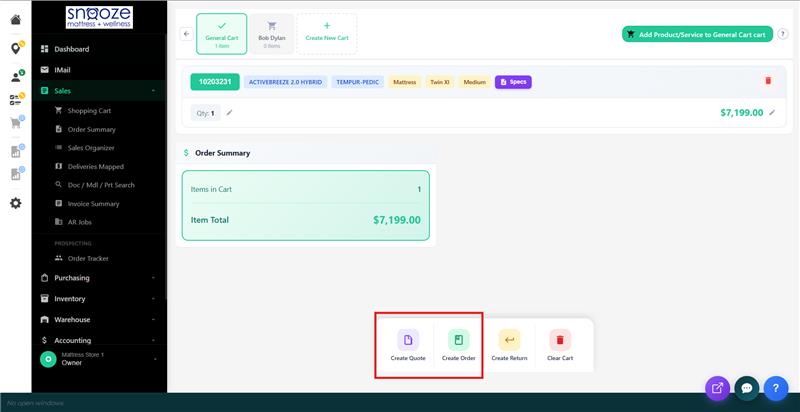
Review the Cart
Back in the cart view, confirm all items, quantities, and prices are correct. Check the Order Summary at the bottom for the total.

Select Quote or Order
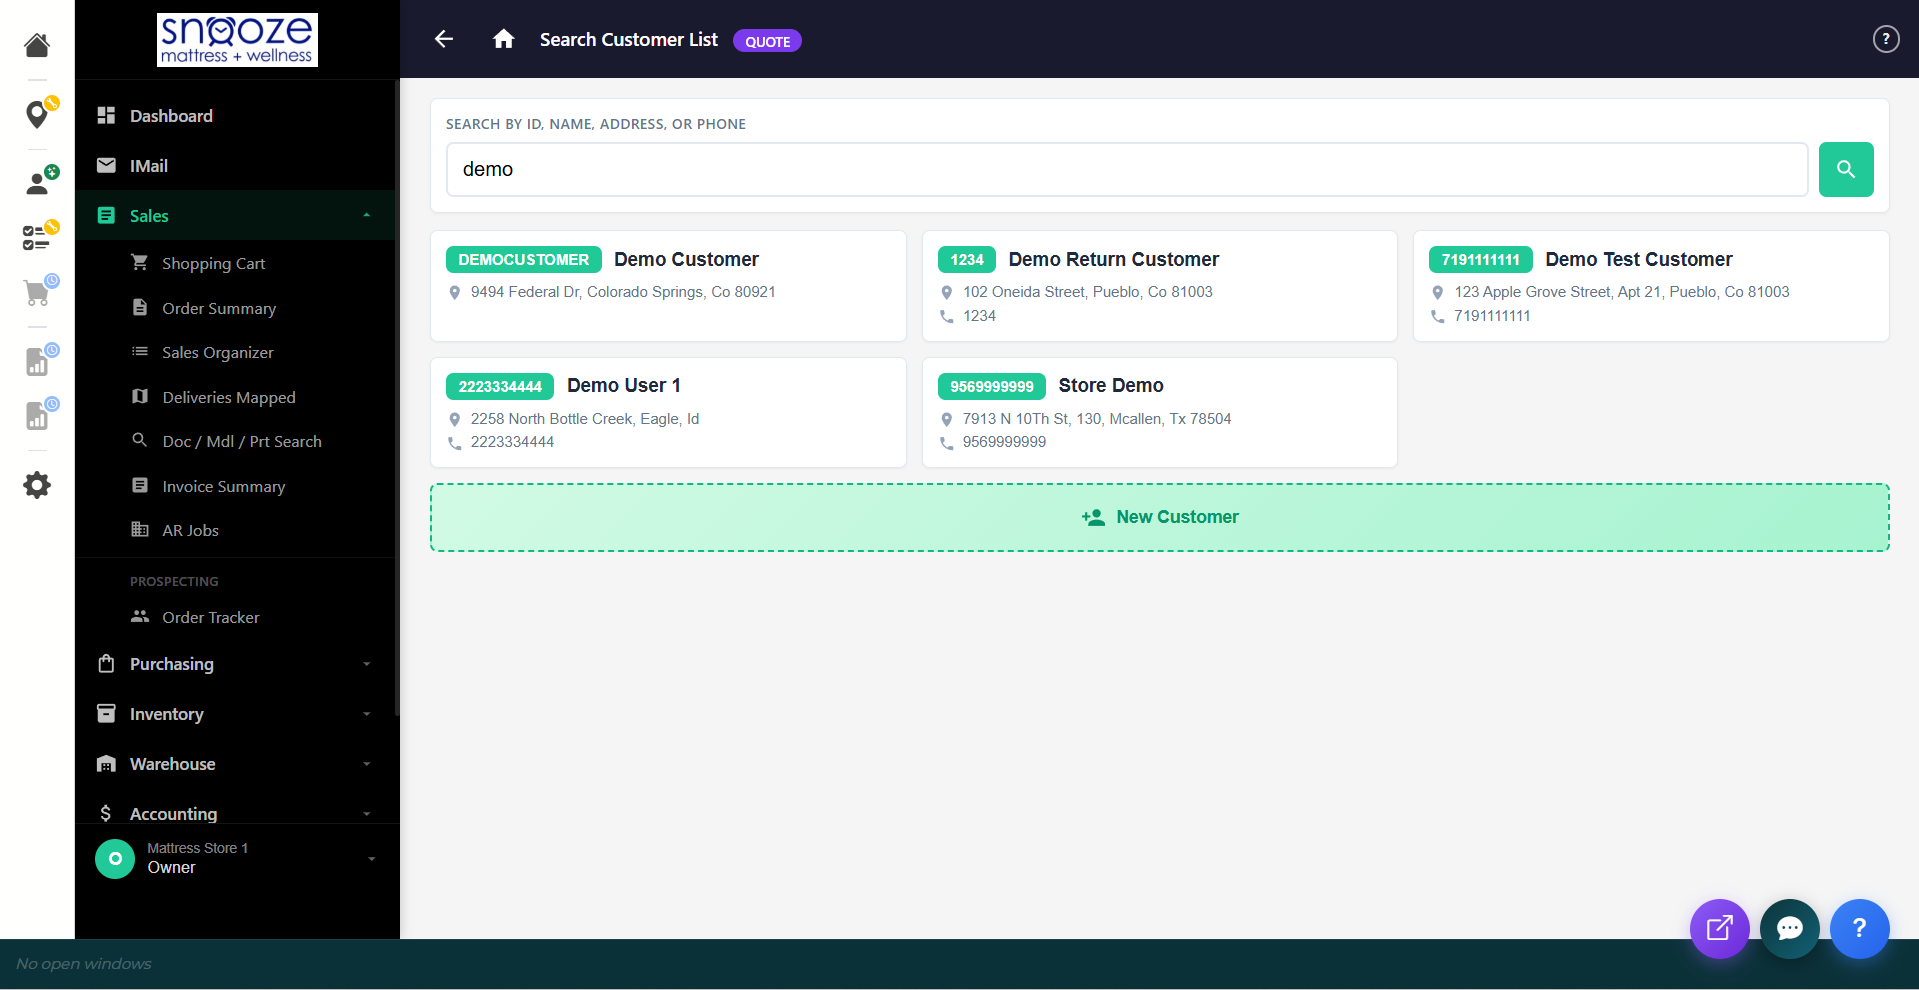
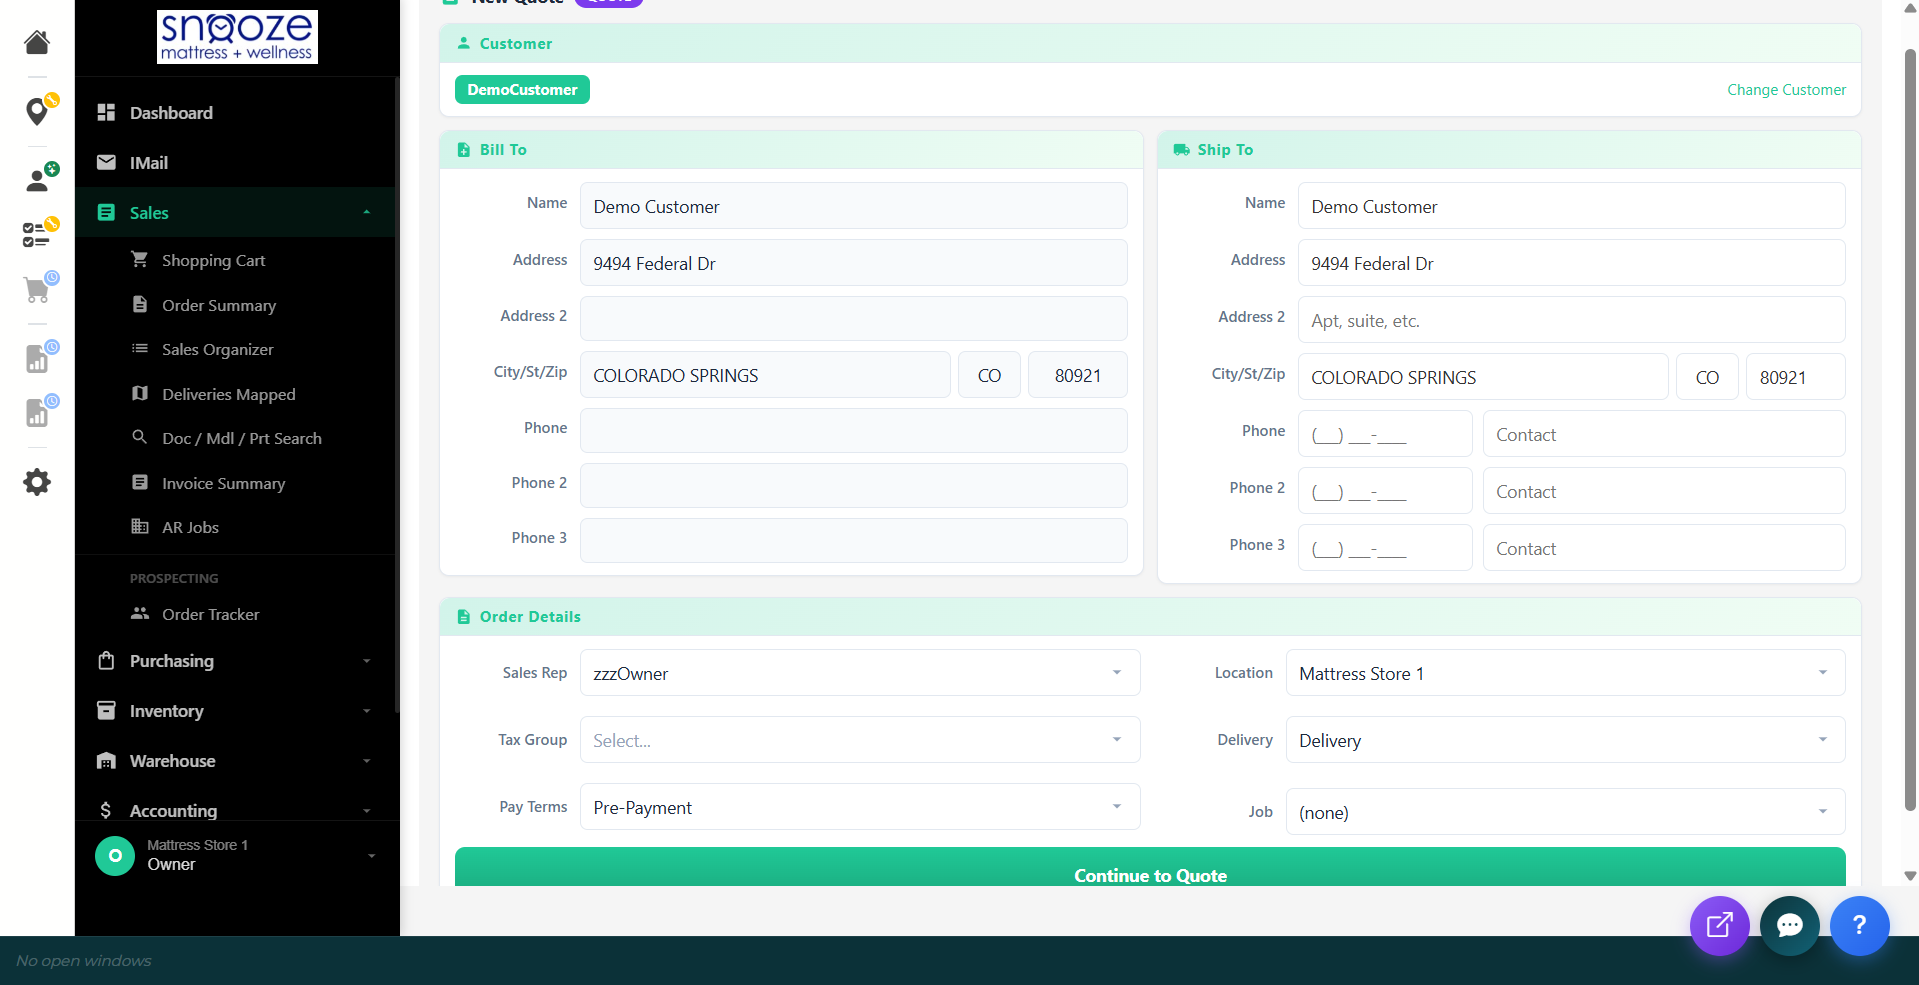
Ask for the Sale! If the customer is not ready to commit, select Create Quote. If they are ready to buy, select Create Order. You will then be prompted to search for or add customer information.
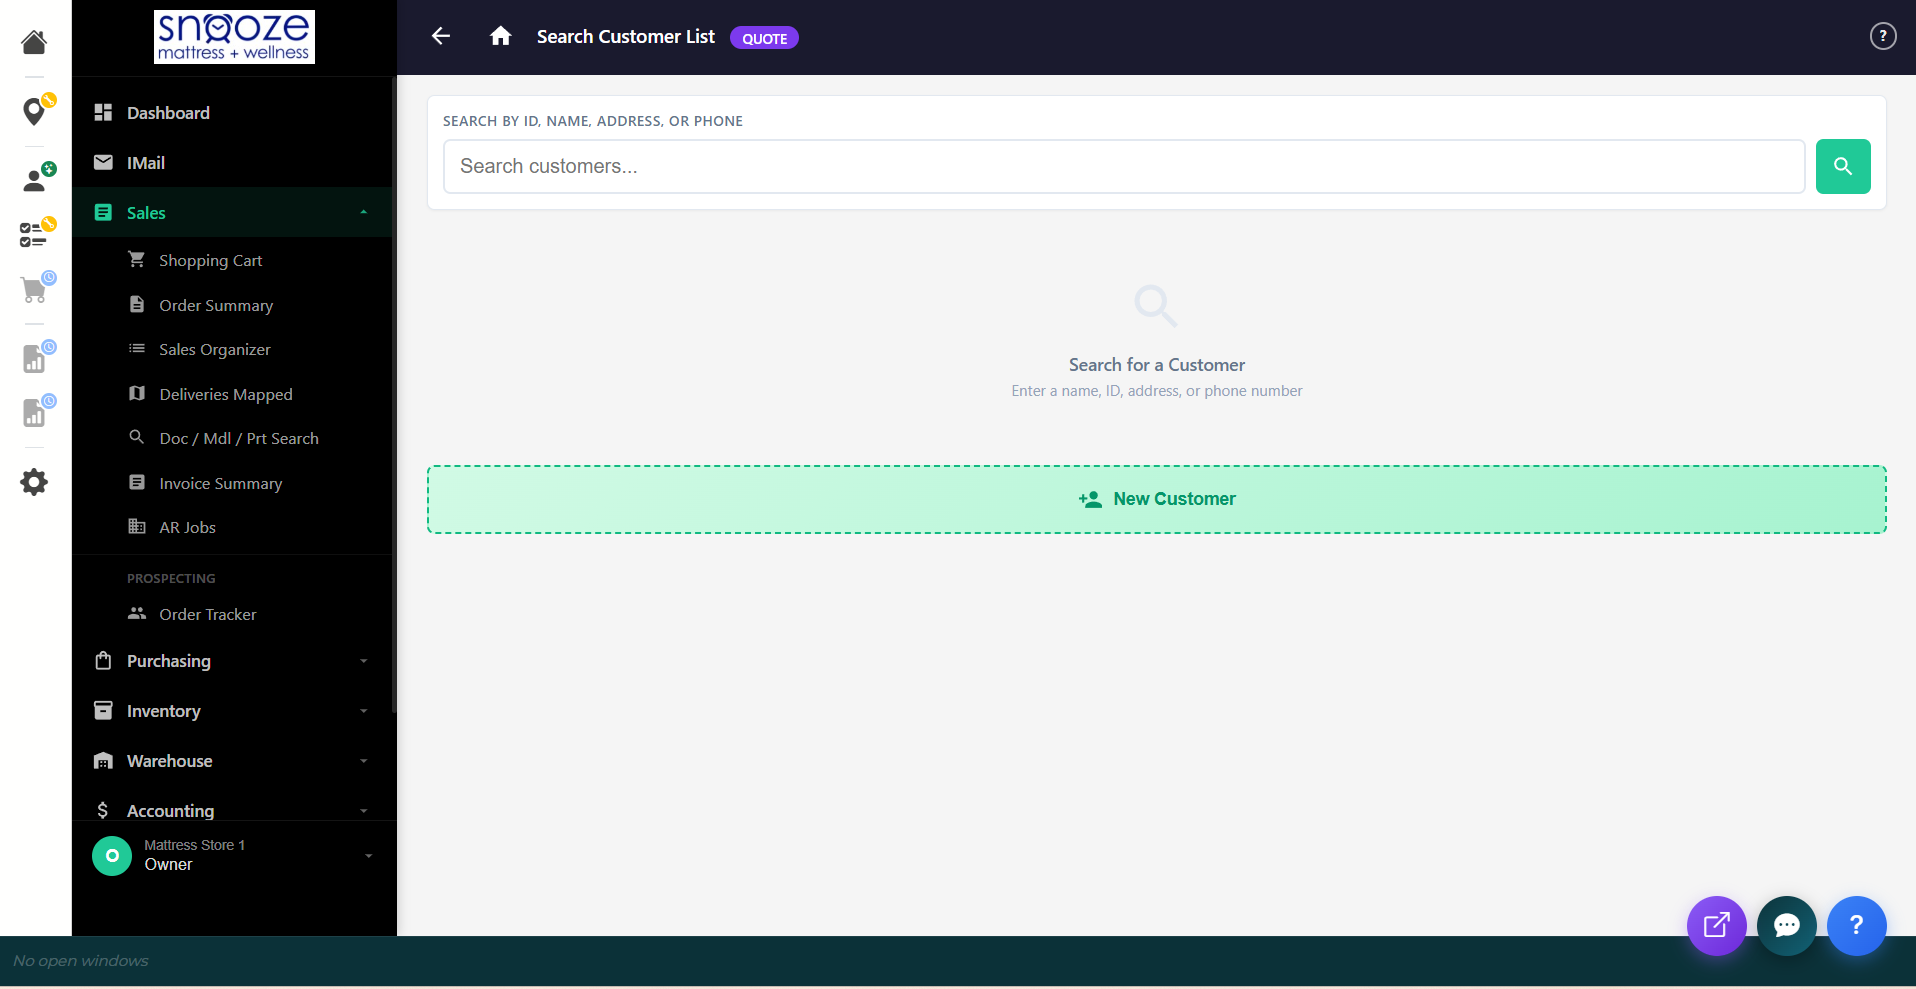
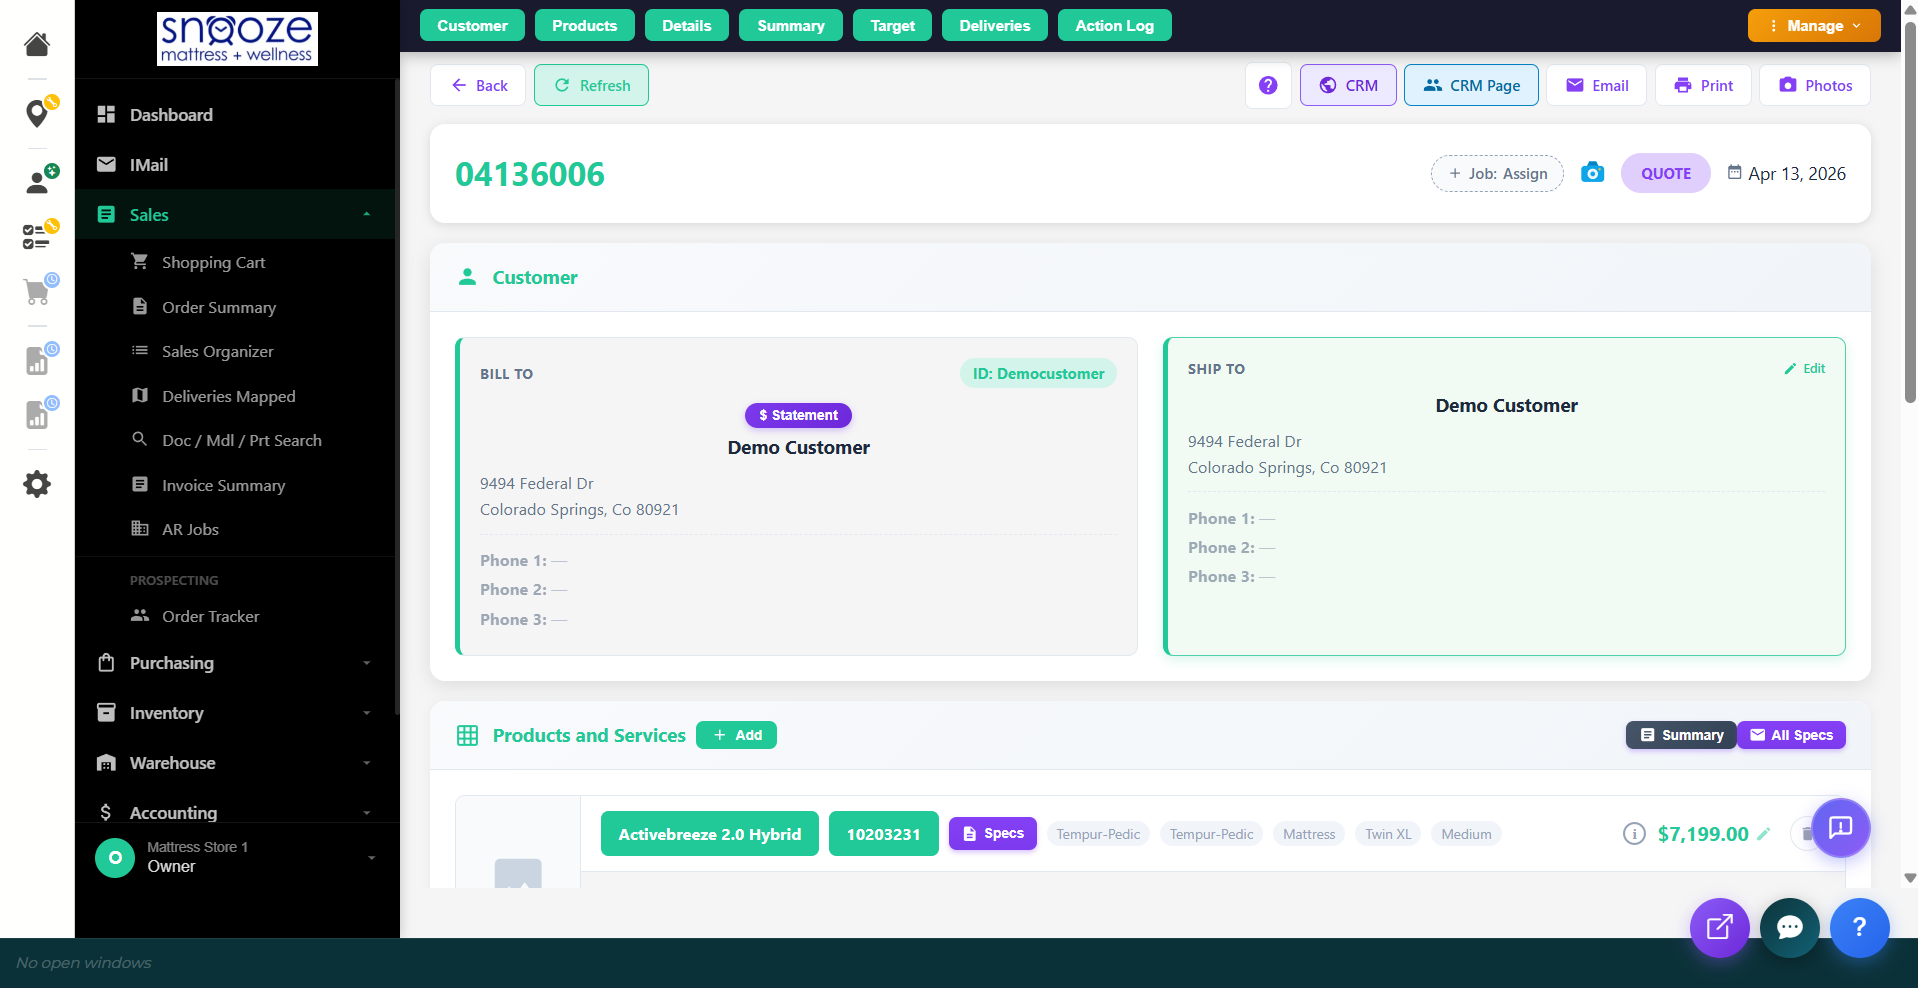
View Created Quotes / Orders
The system will then create a quote/order document with a unique number. You can print or email this to the customer.
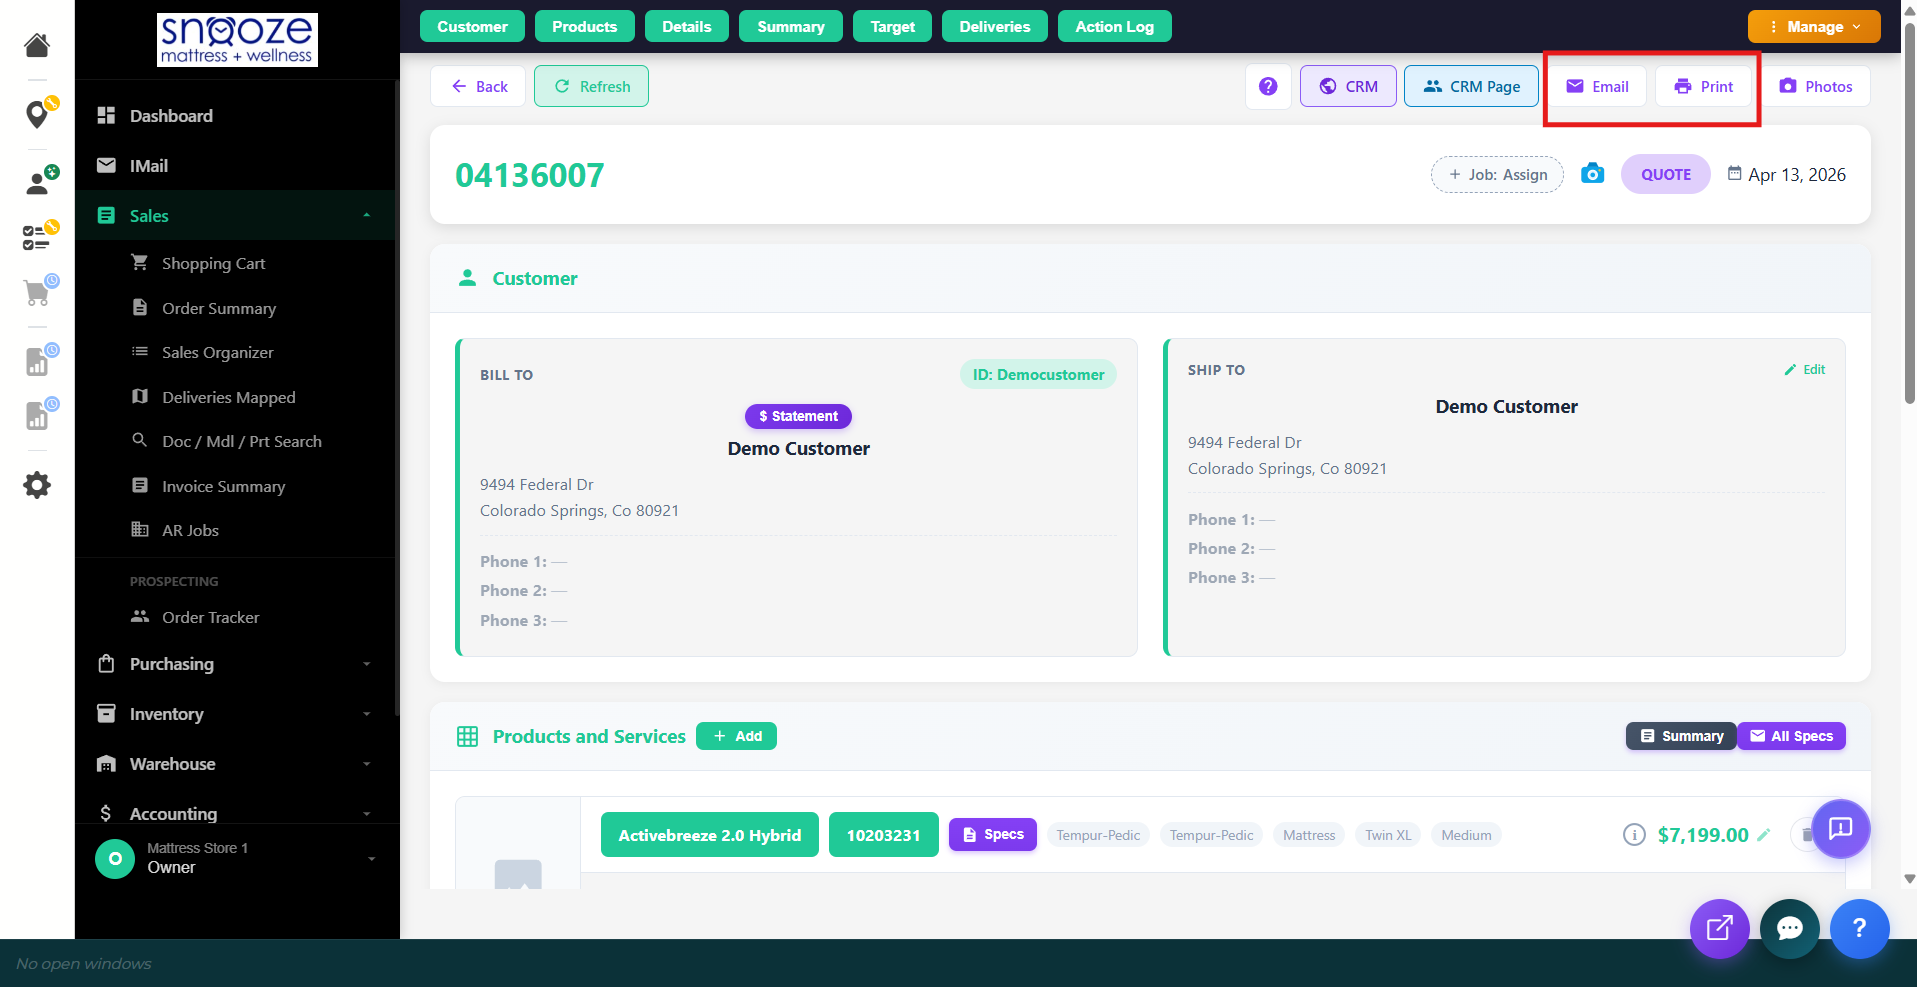
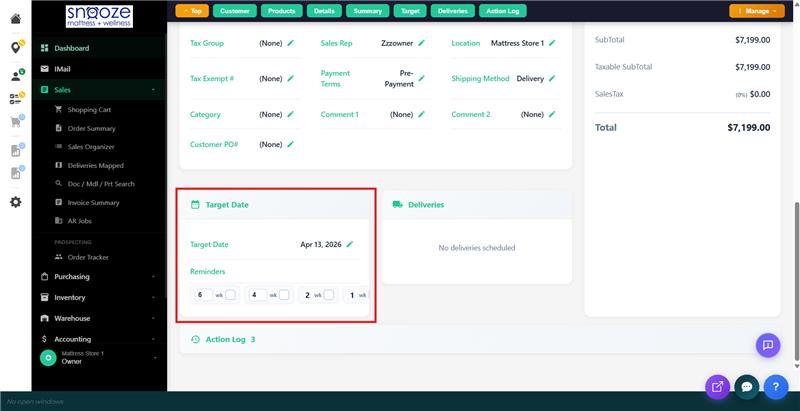
Set a Target Date
On the quote screen, click the pencil icon next to Target Date and set a follow-up date. Set reminders (e.g., 6, 4, 2, 1 weeks) so the system alerts you to make sure the customer's order is on track for when they need the item(s), and if a quote, before the quote goes cold.
Converting a Quote to an Order
Open the Quote
Find the quote in Sales → Sales Organizer or use Doc / Model / Part Search to look it up by quote number. Click to open it.
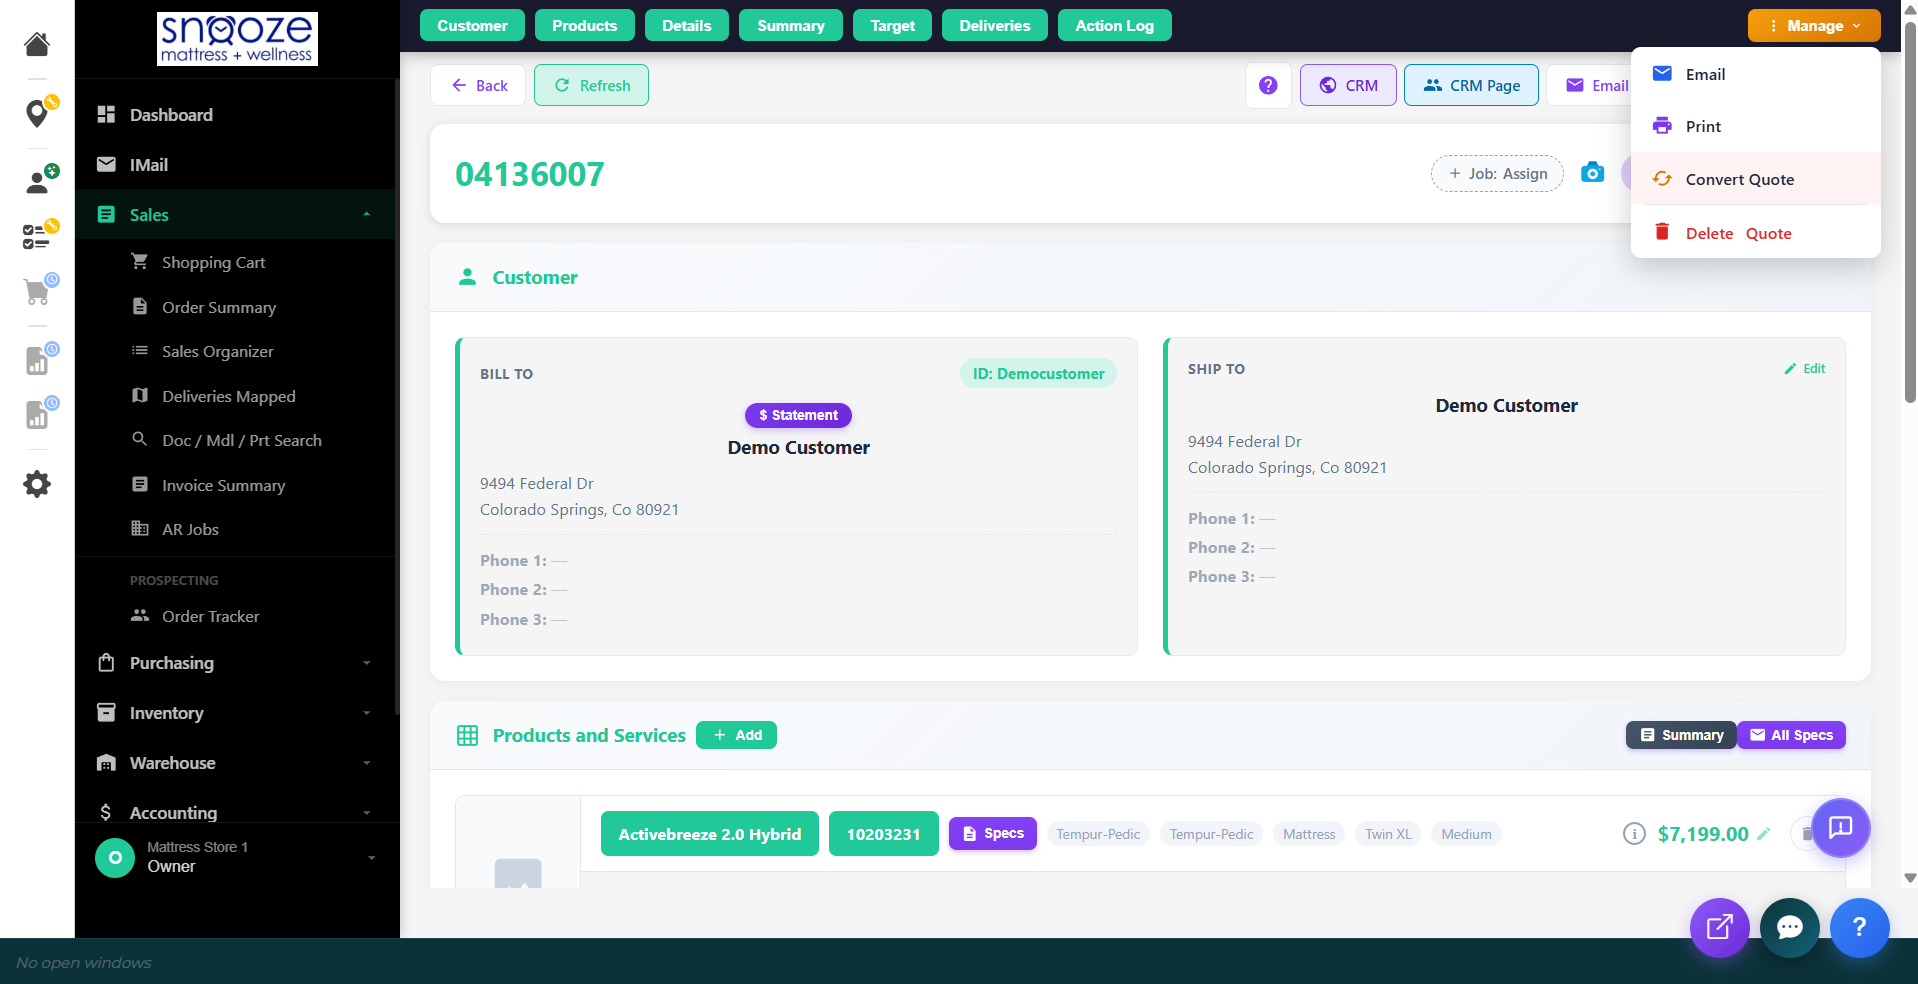
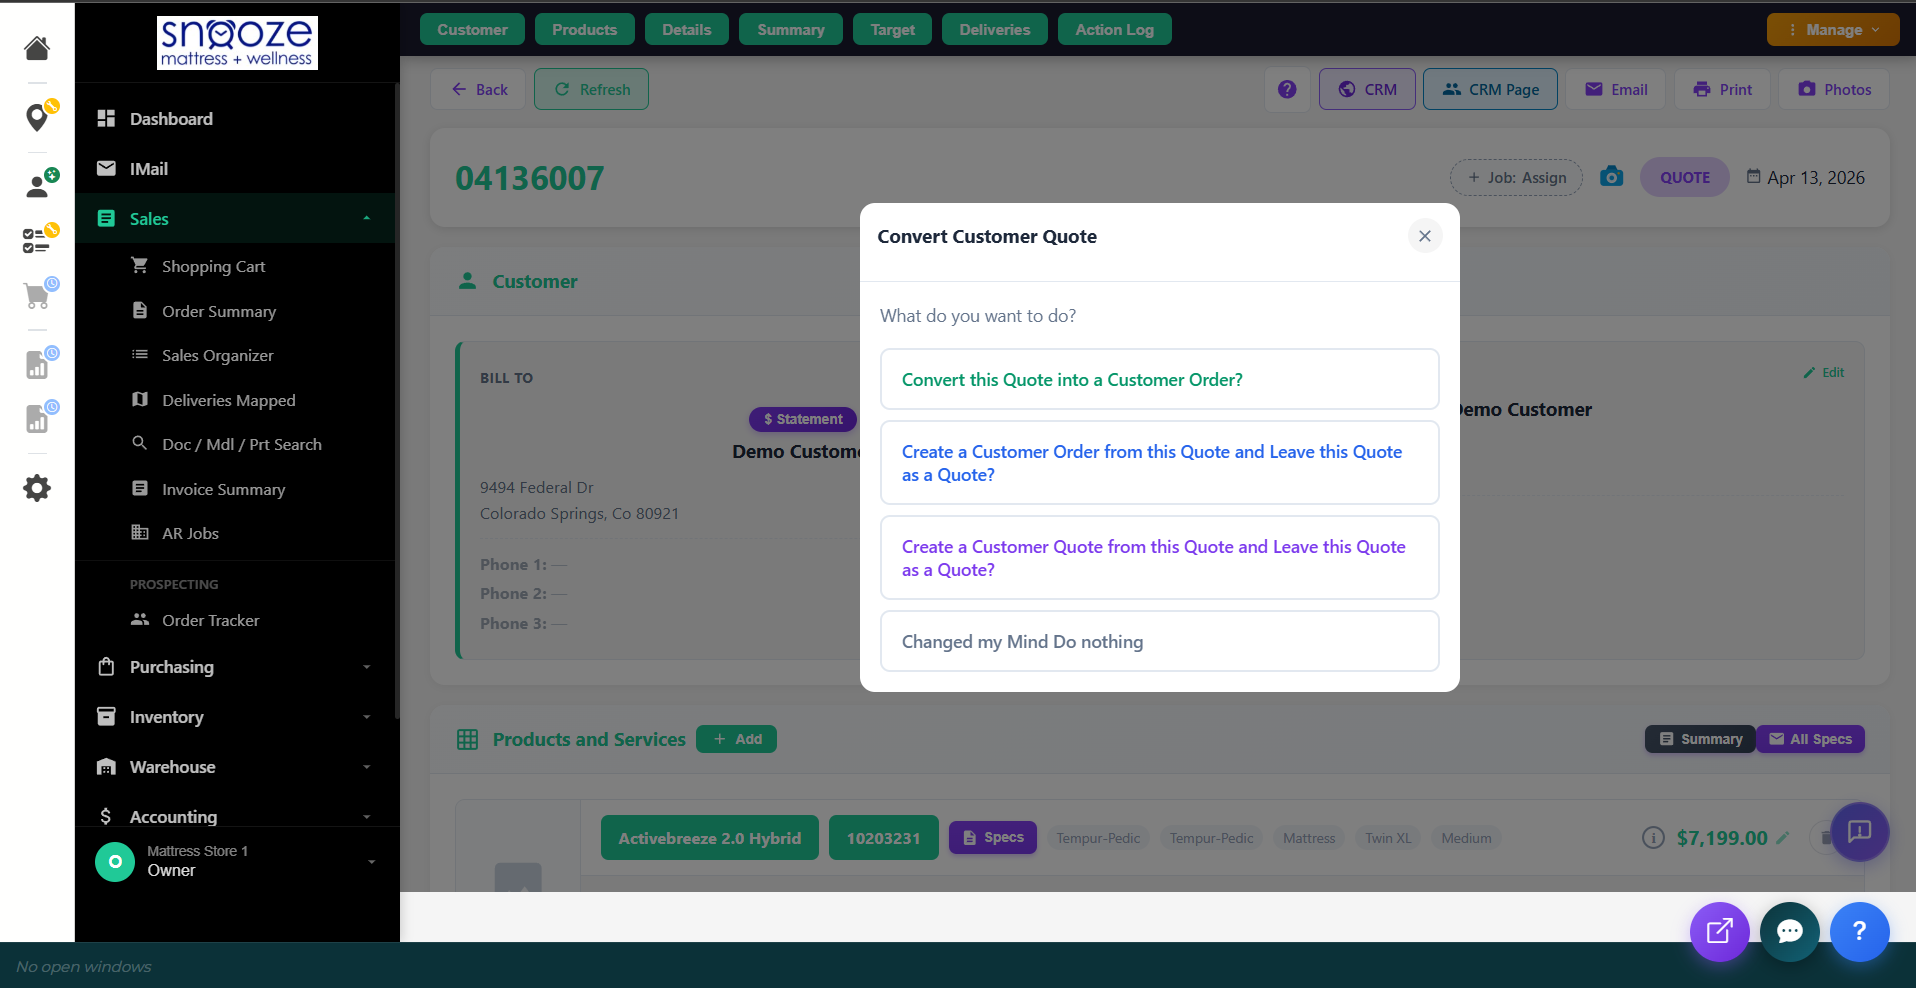
Convert the Quote
On the quote detail screen, click the Manage button in the top right and select Convert Quote. Choose "Convert this Quote into a Customer Order?" to convert it into a live sales order. The badge changes from purple (QUOTE) to green (ORDER).
Request Product & Schedule Delivery
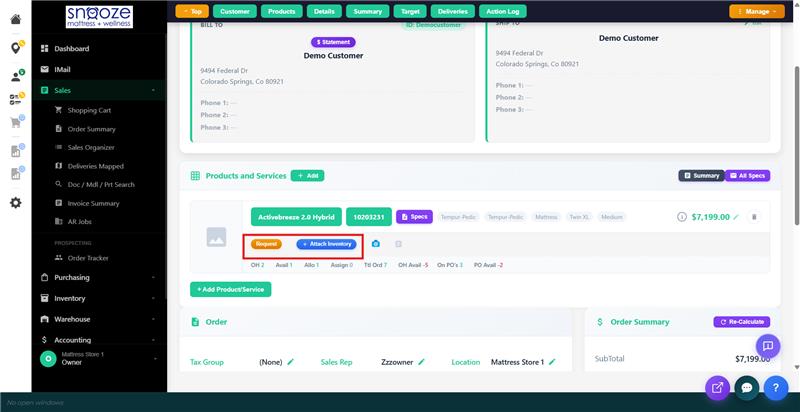
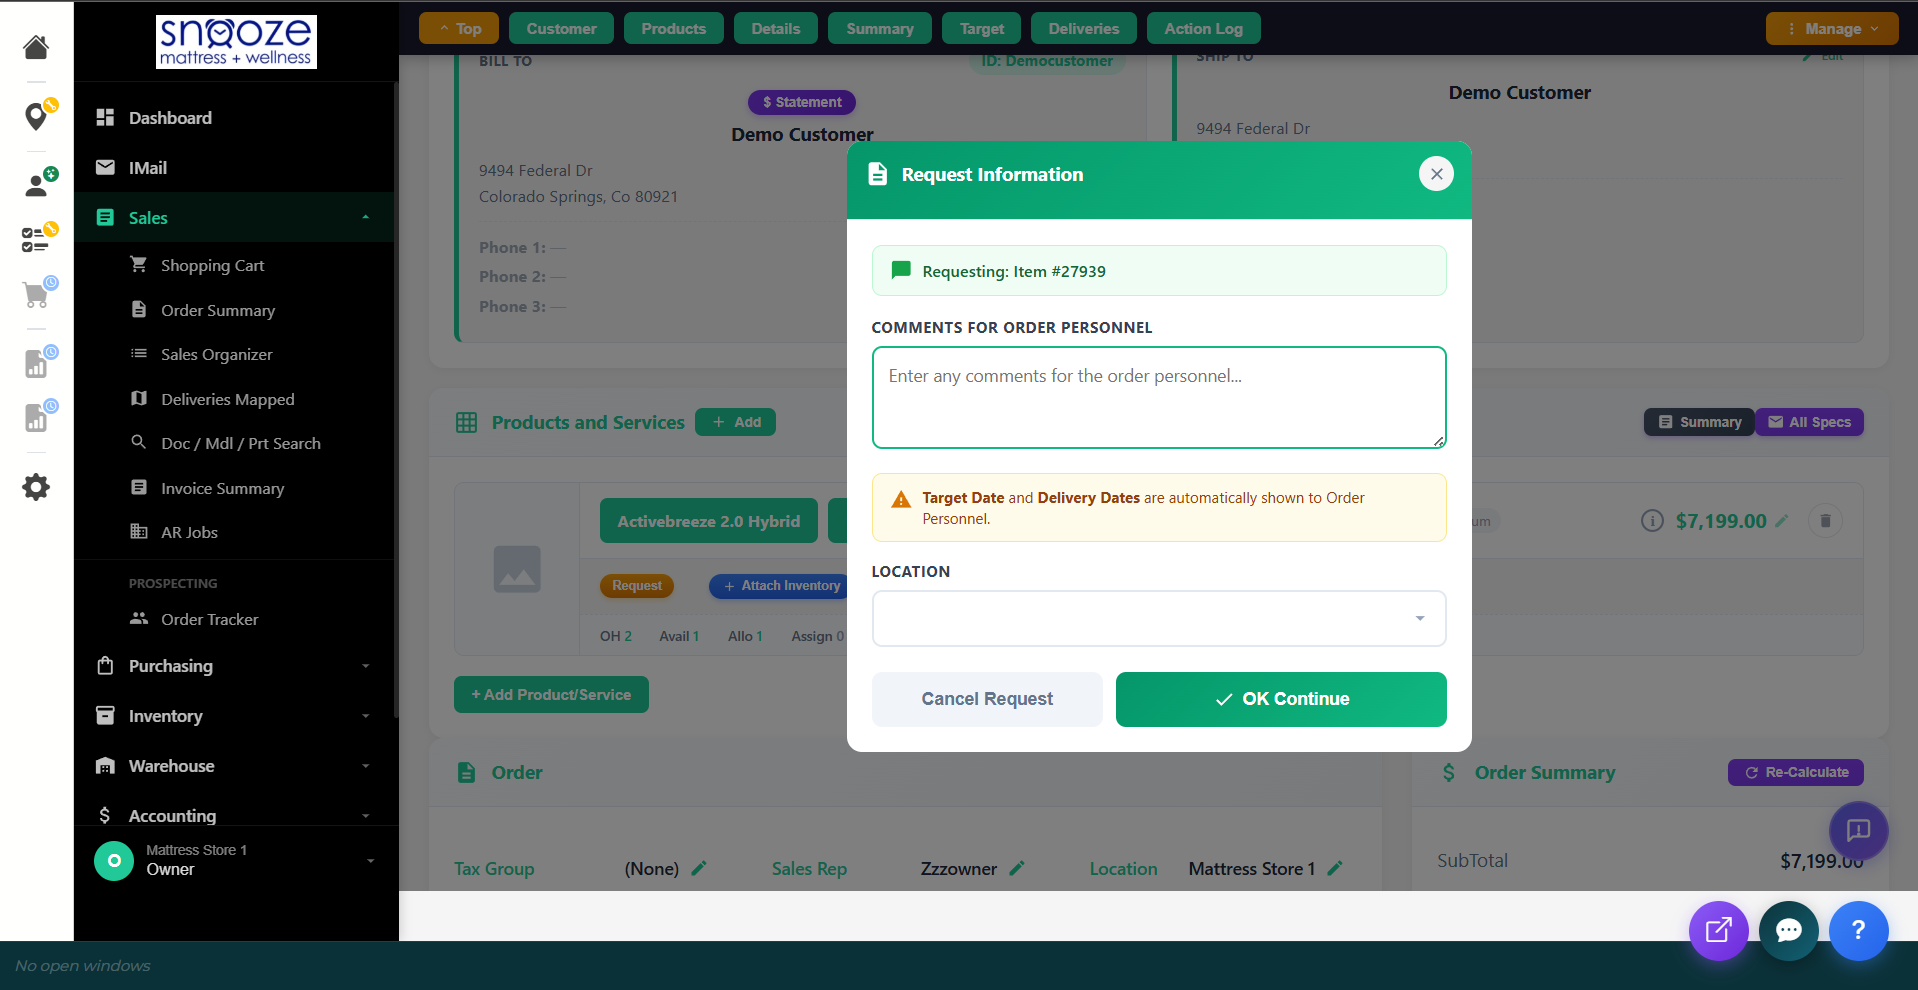
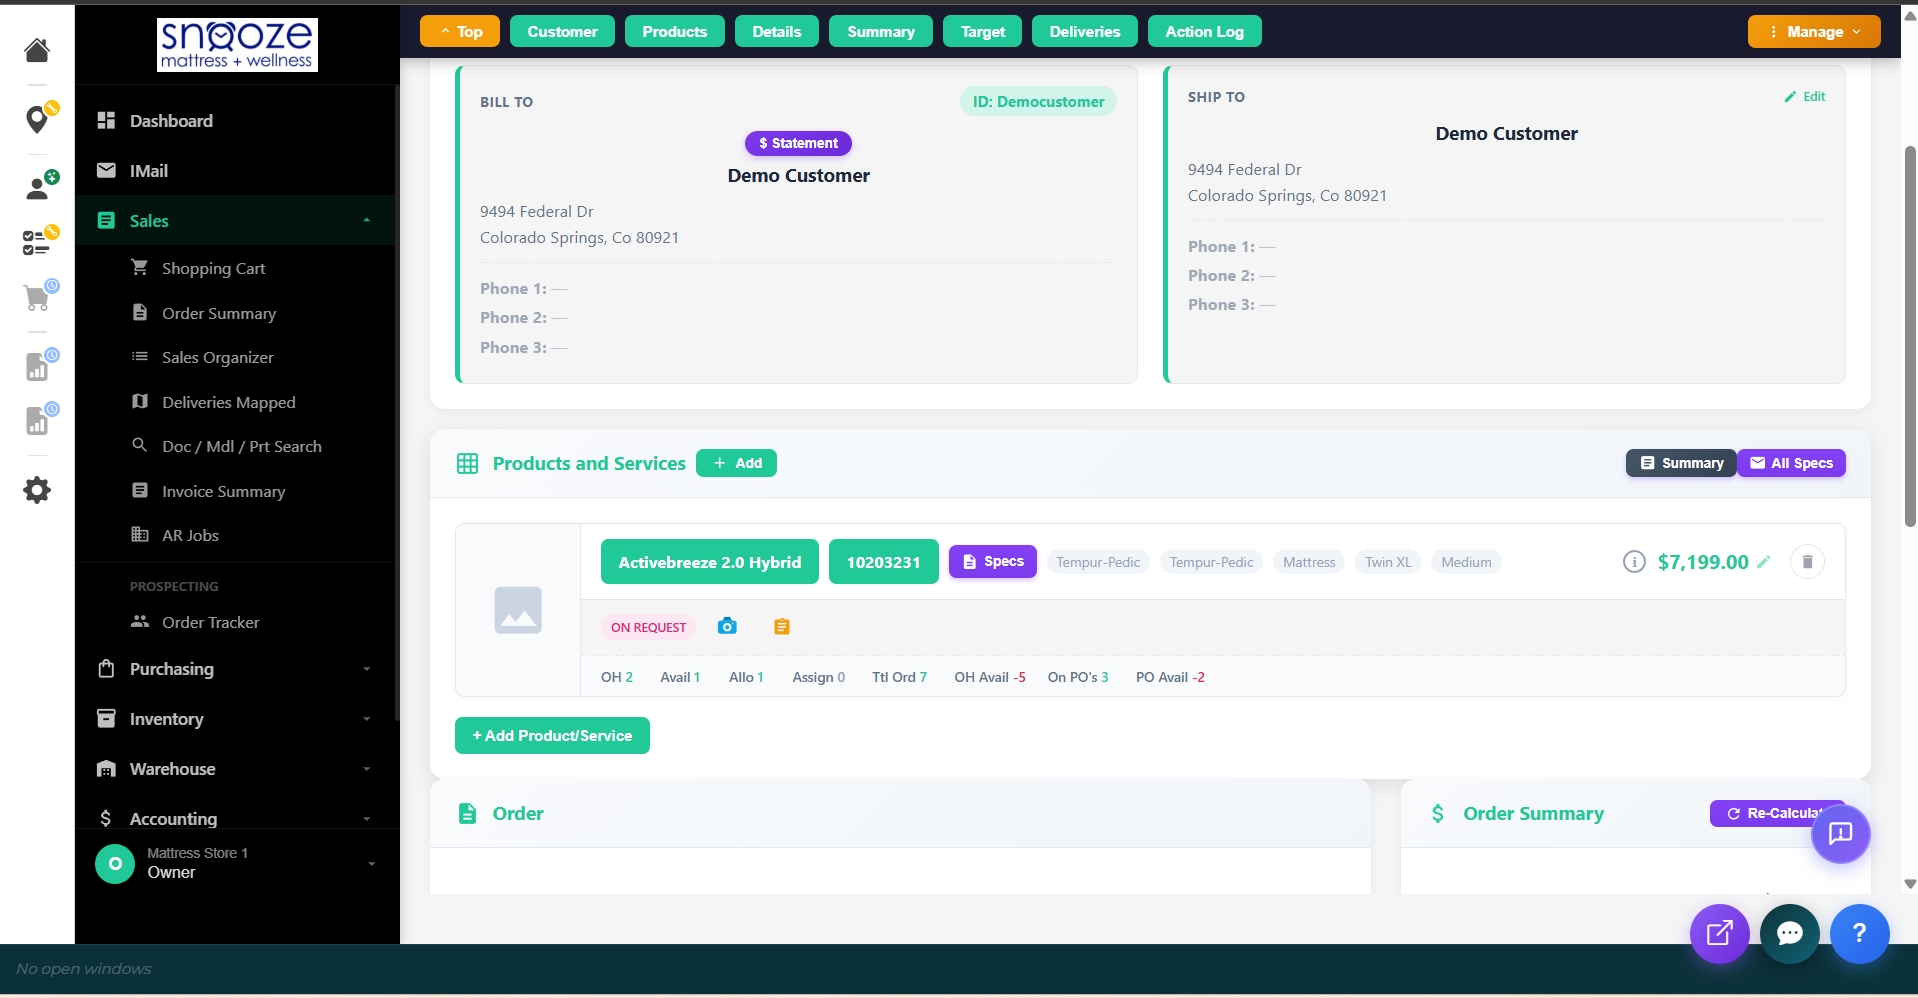
Request or Attach Inventory
On the order screen, each line item shows two buttons: Request and Attach Inventory. Click Request to notify the purchaser that the product needs to be ordered — the Target Date you set earlier helps them know when it needs to arrive. Add any comments for the order personnel and click OK Continue. If the product is already physically in your store's inventory, click Attach Inventory to select the specific unit.
Schedule the Delivery
On the order, you will see the option to schedule delivery. Click on it and it will bring you to a calendar view of your delivery schedule.

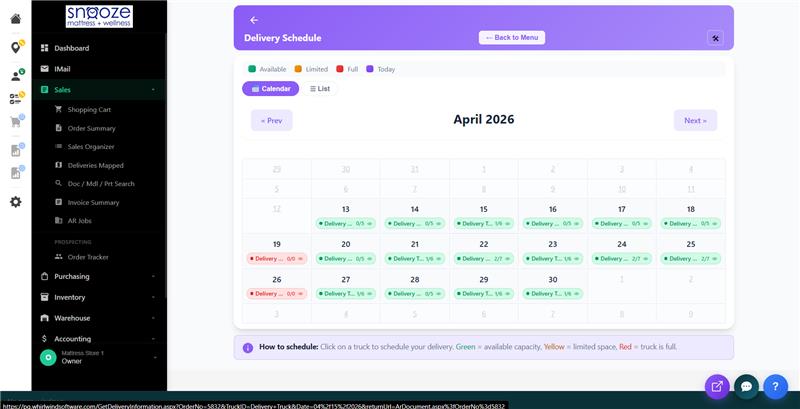
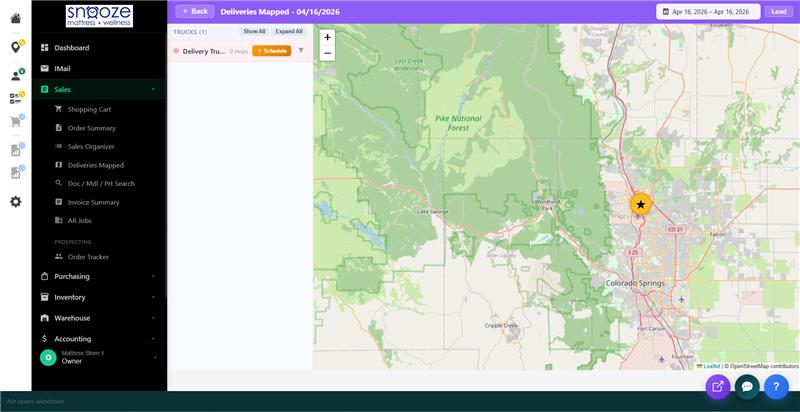
View Delivery Map
Click the "eye" icon on the day the customer is desiring delivery. This will pull up a map of all deliveries scheduled for that day. From this screen you can also view a date range of deliveries that are scheduled.

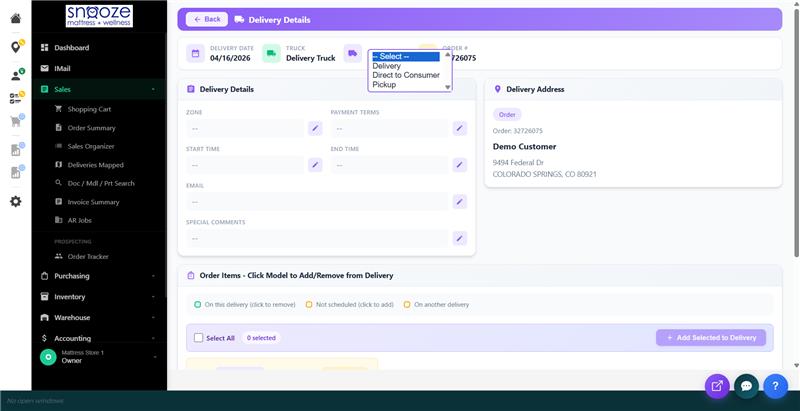
Schedule the Delivery
Click the + Schedule button on the truck to create a new delivery. Fill in the Delivery Details — select the delivery type (Delivery, Direct to Consumer, or Pickup), set the zone, payment terms, and time window. The customer's address will auto-populate from the order.
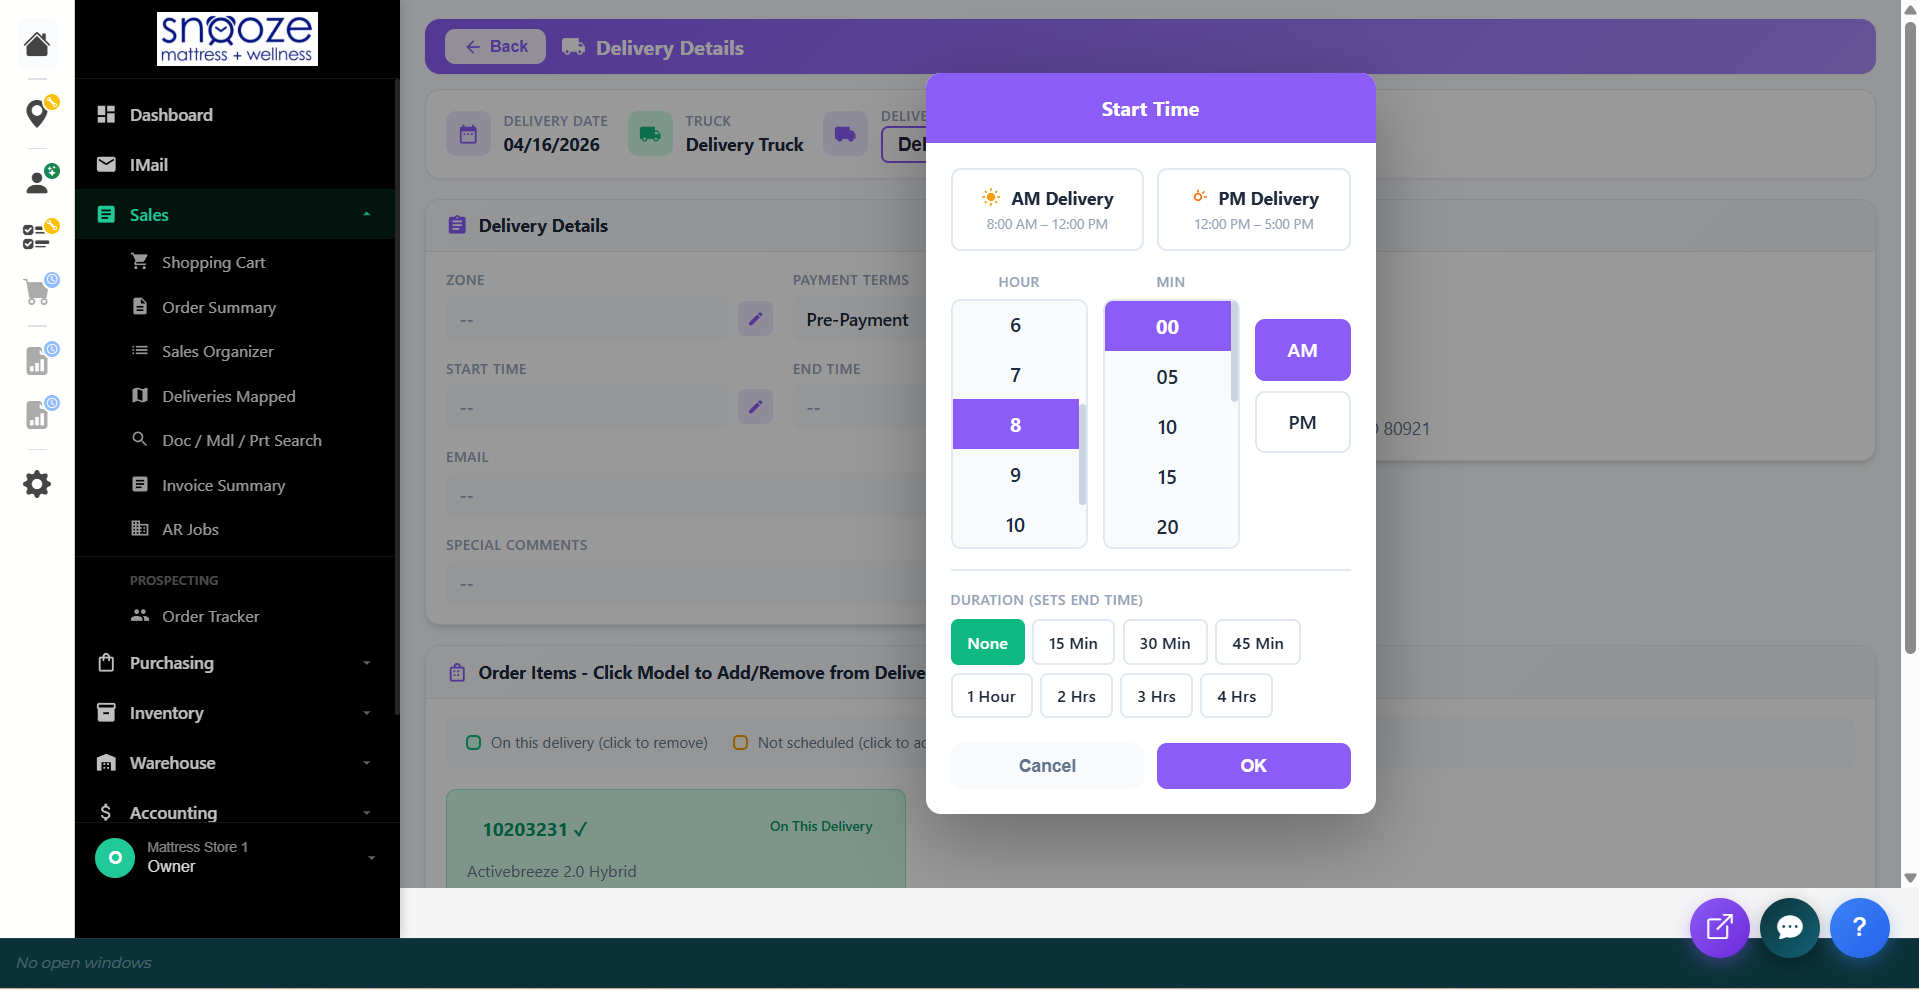
Set the Delivery Time
Click the Start Time field to set the delivery window. Choose AM Delivery (8:00 AM – 12:00 PM) or PM Delivery (12:00 PM – 5:00 PM), select the hour and minutes, and set the duration. Click OK to save.
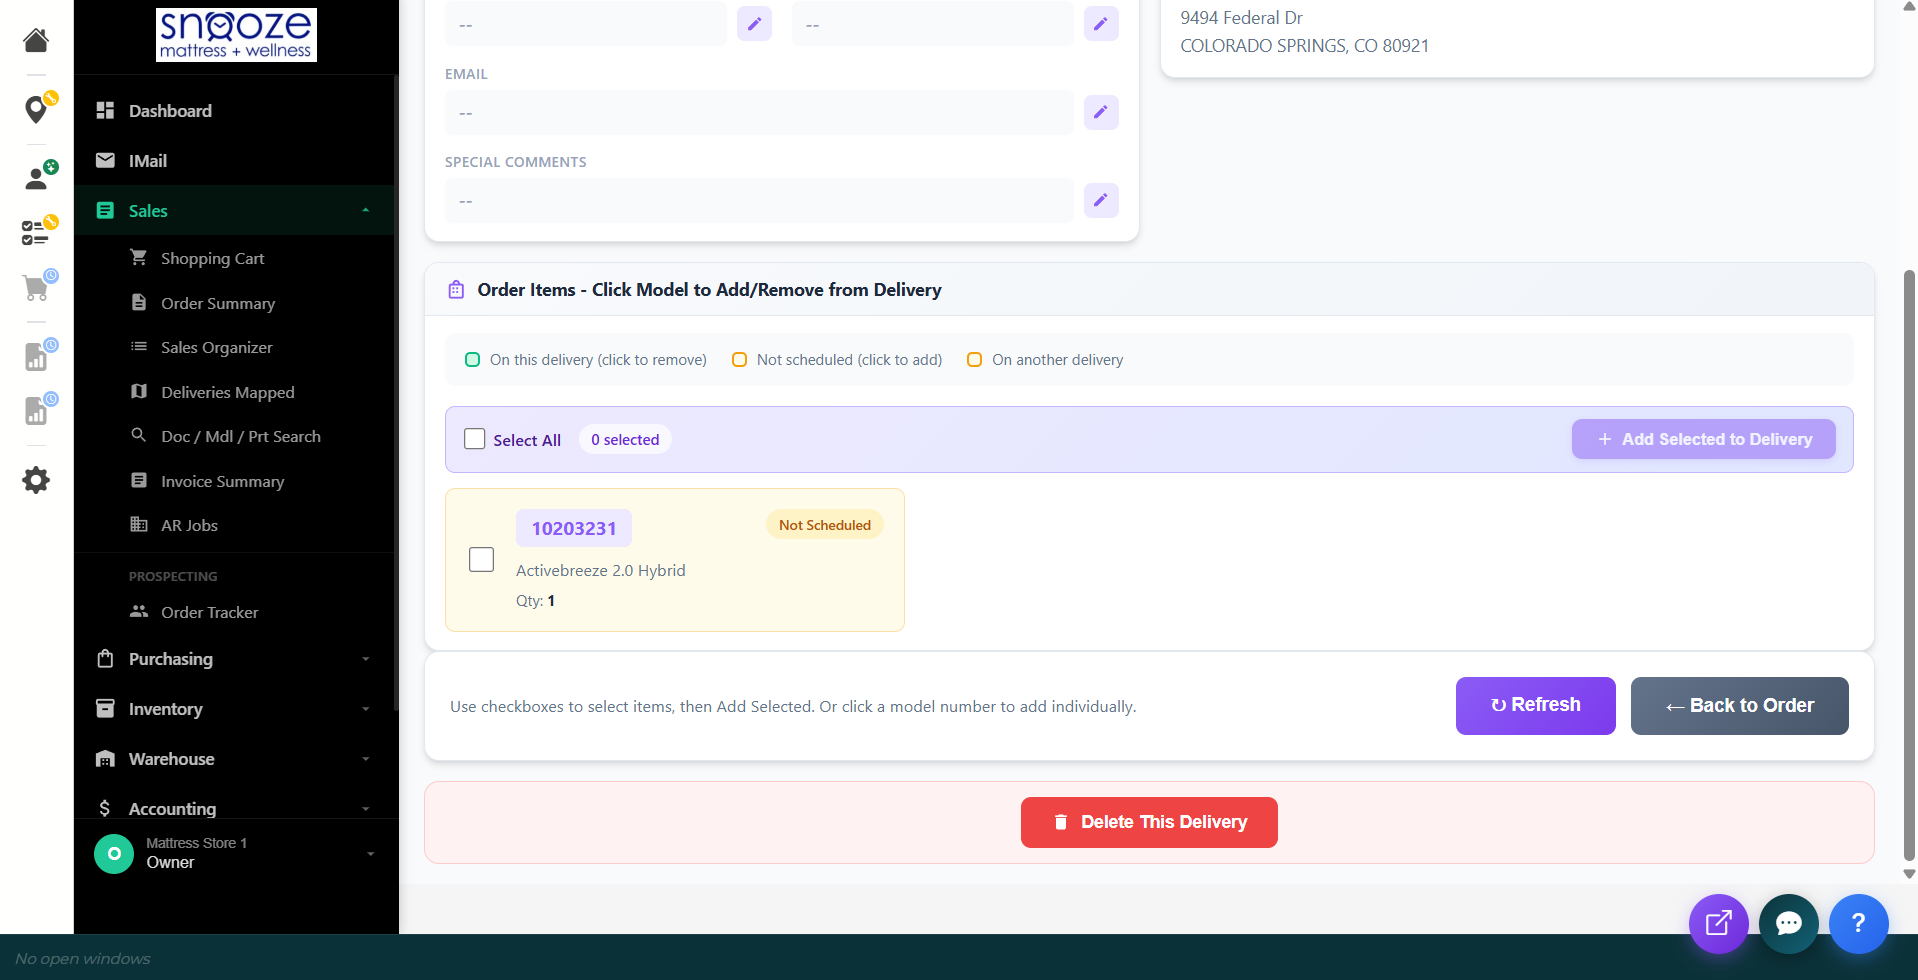
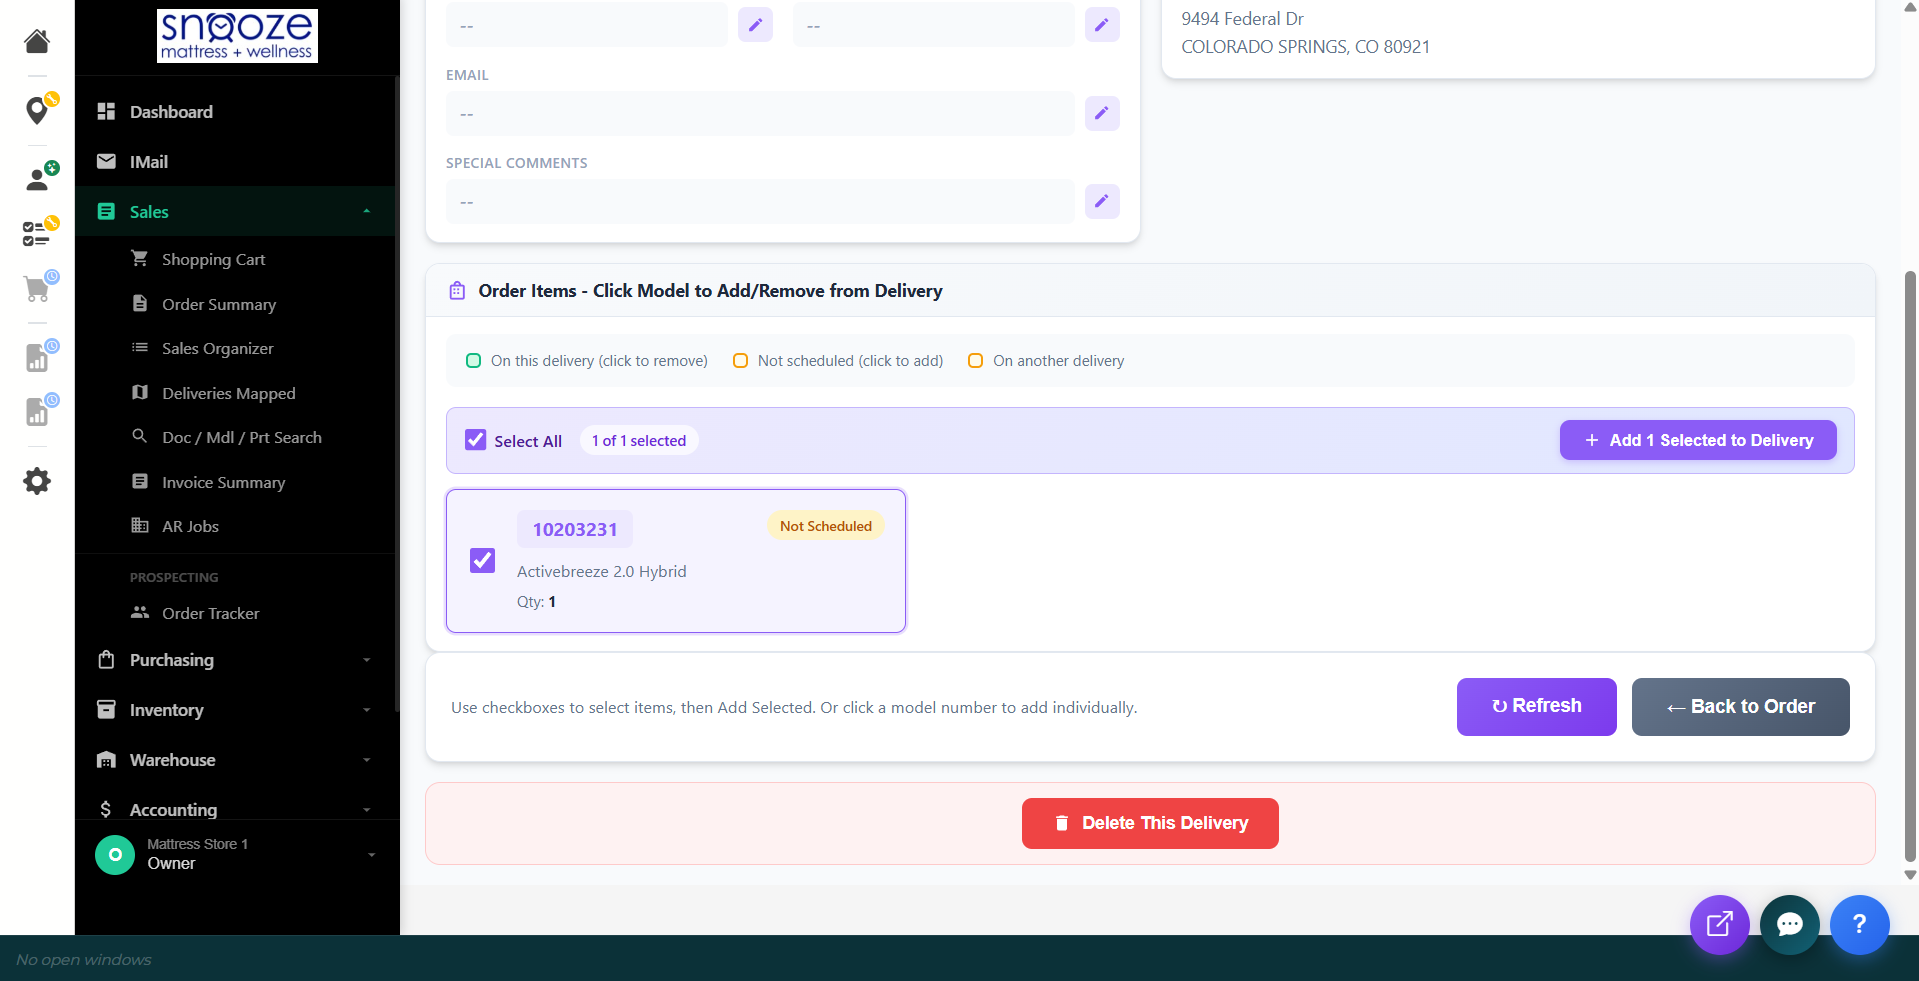
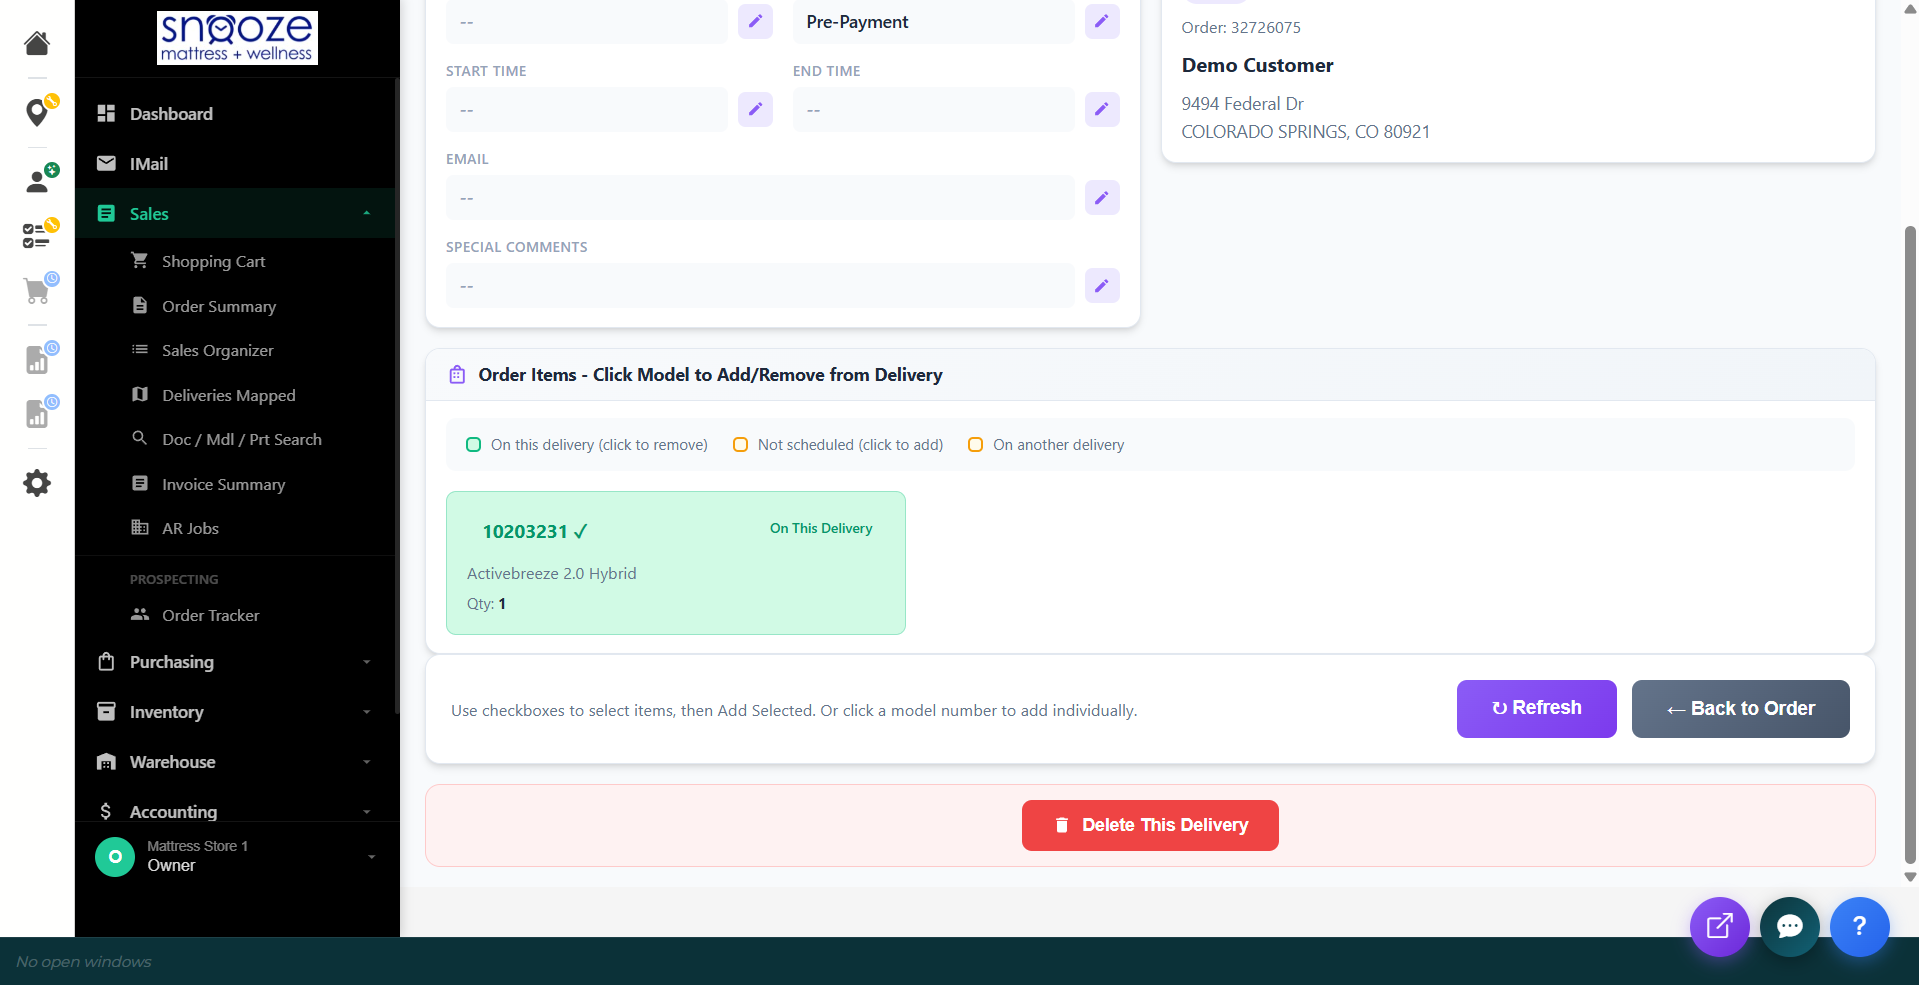
Add Items to the Delivery
In the Order Items section, select the items to include on this delivery by checking the boxes next to each item, then click Add Selected to Delivery. The item status will change from "Not Scheduled" to "On This Delivery."
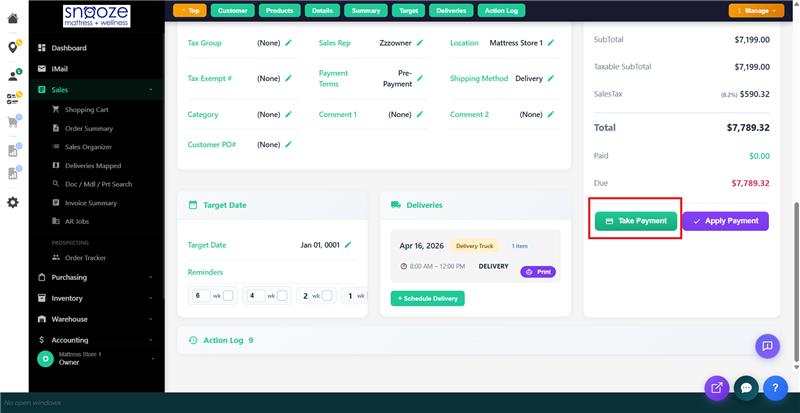
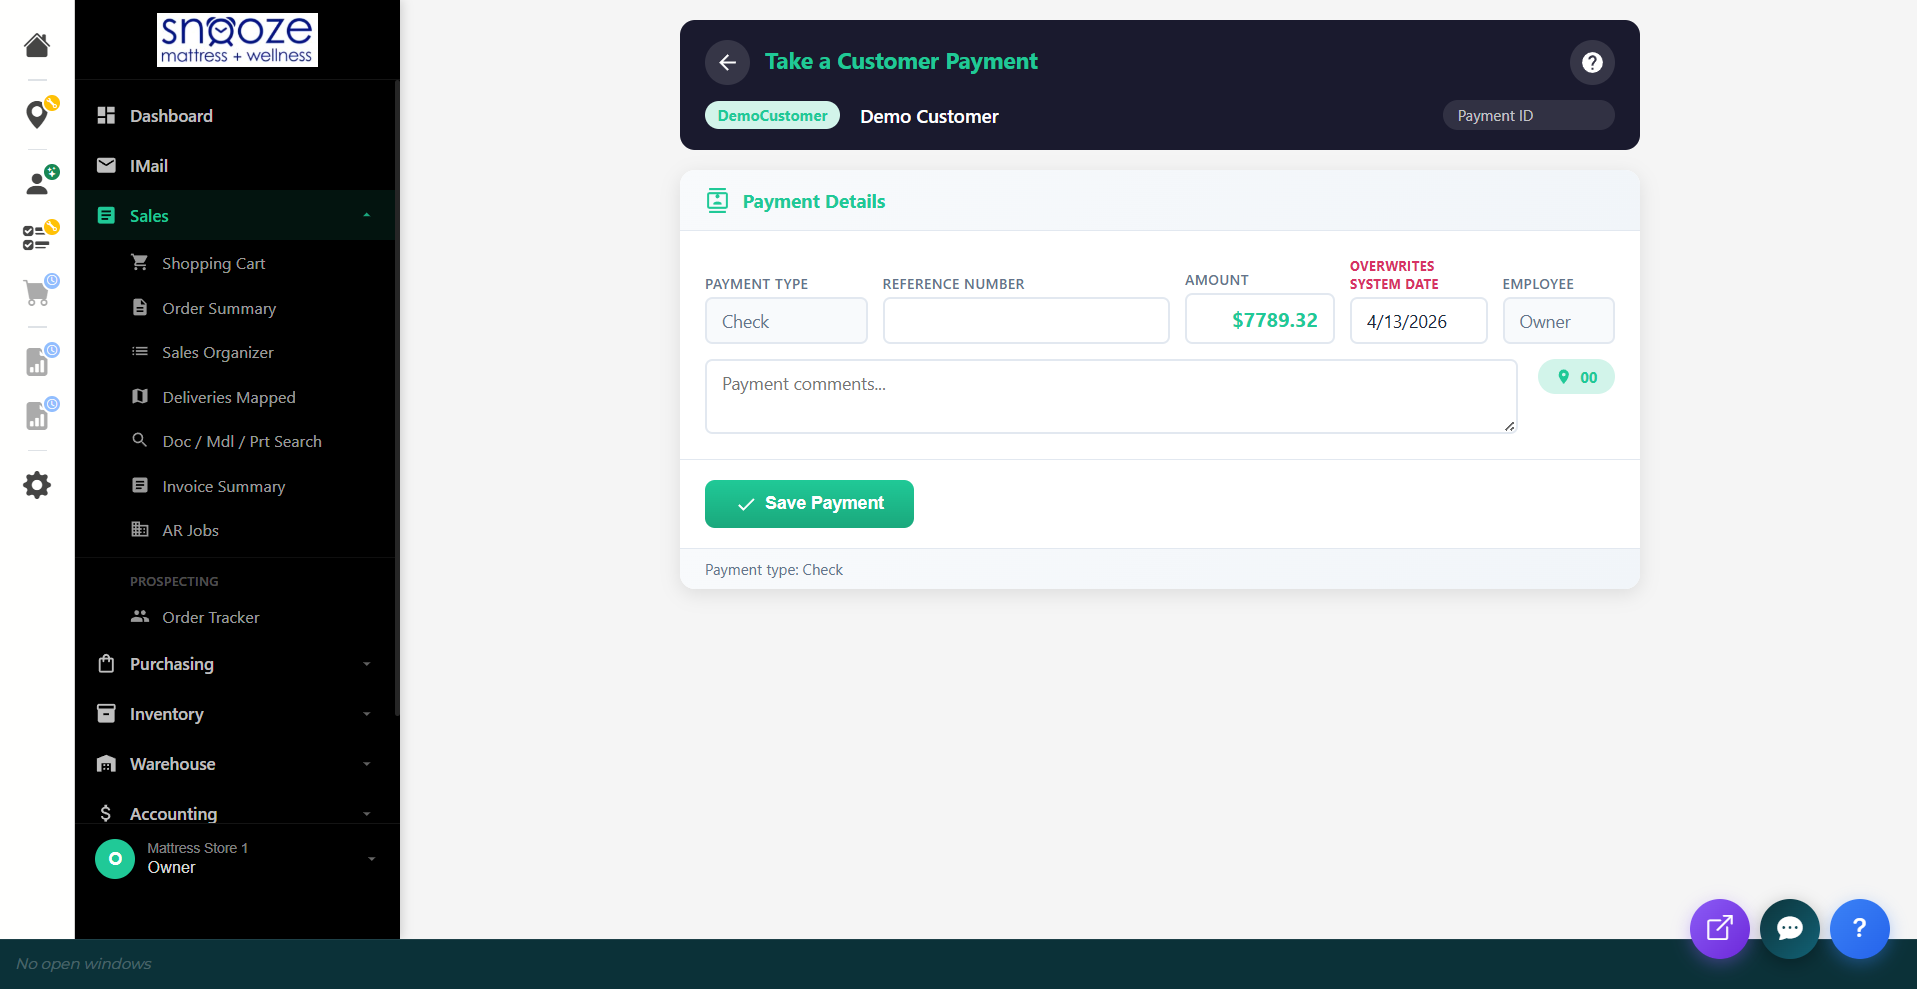
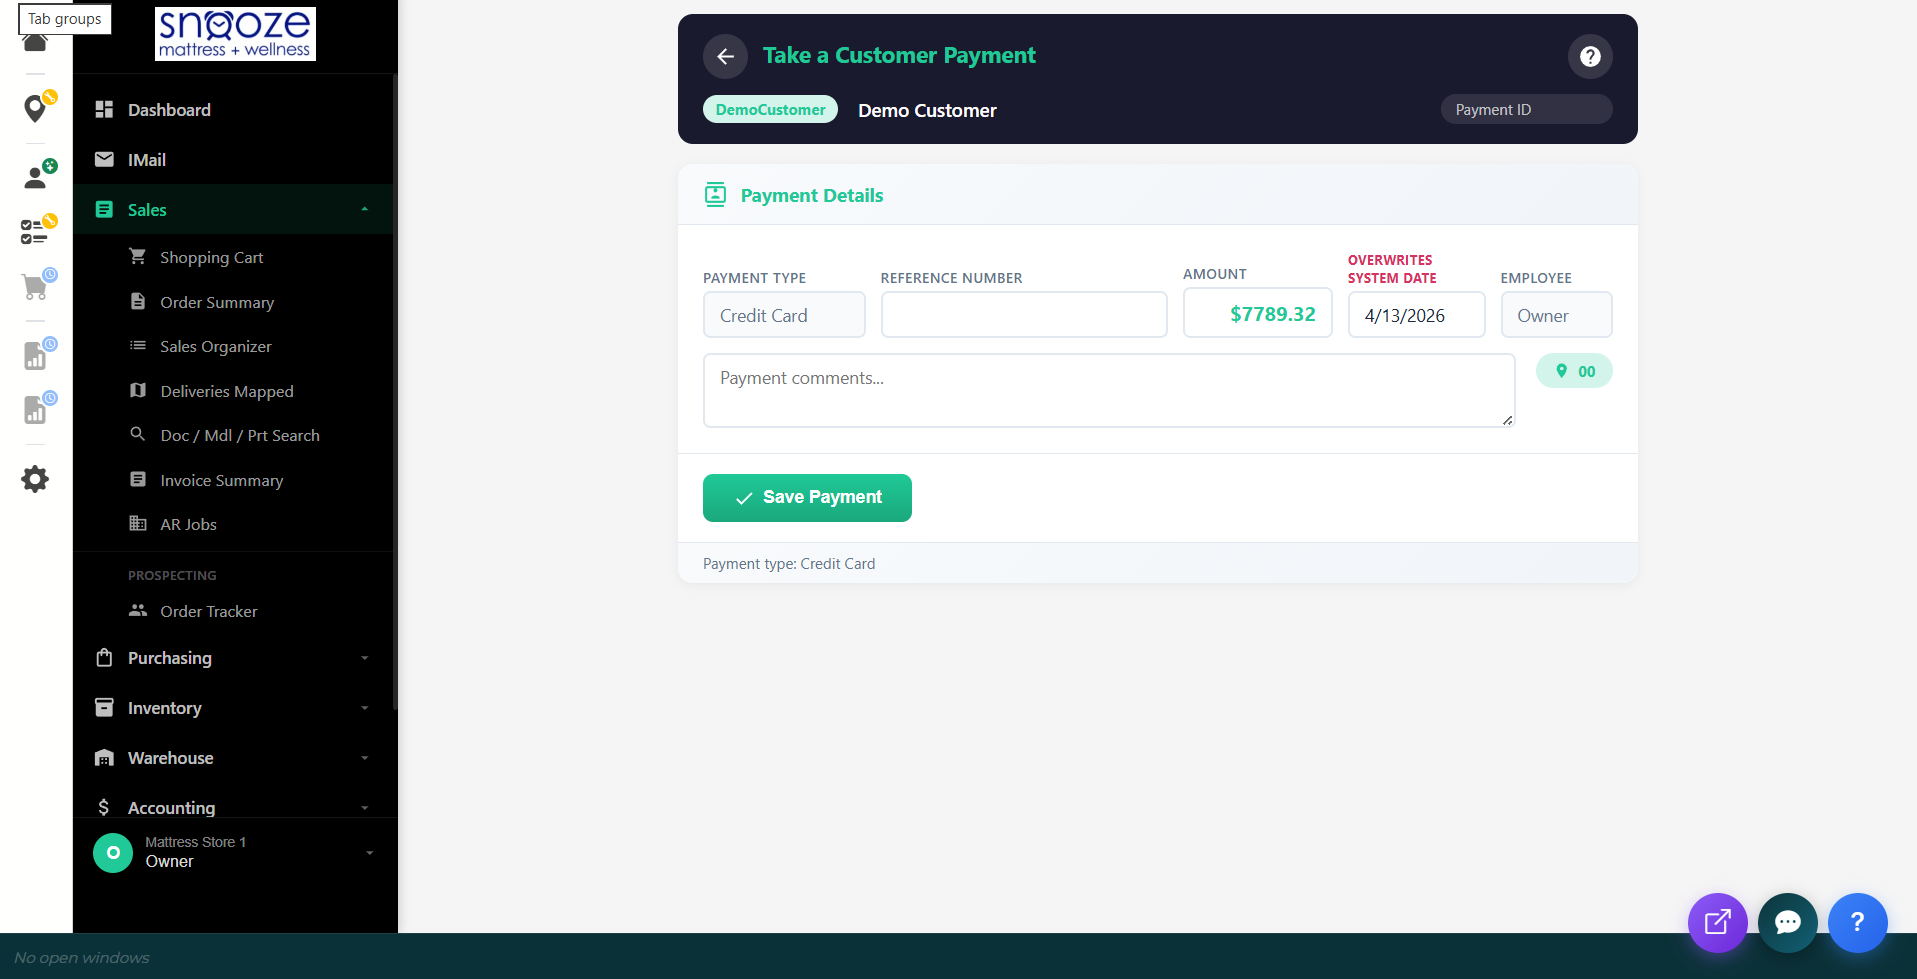
Taking Payment
Open the Payment Screen
On the order detail screen, click the Payment or Take Payment button. This opens the payment entry form.
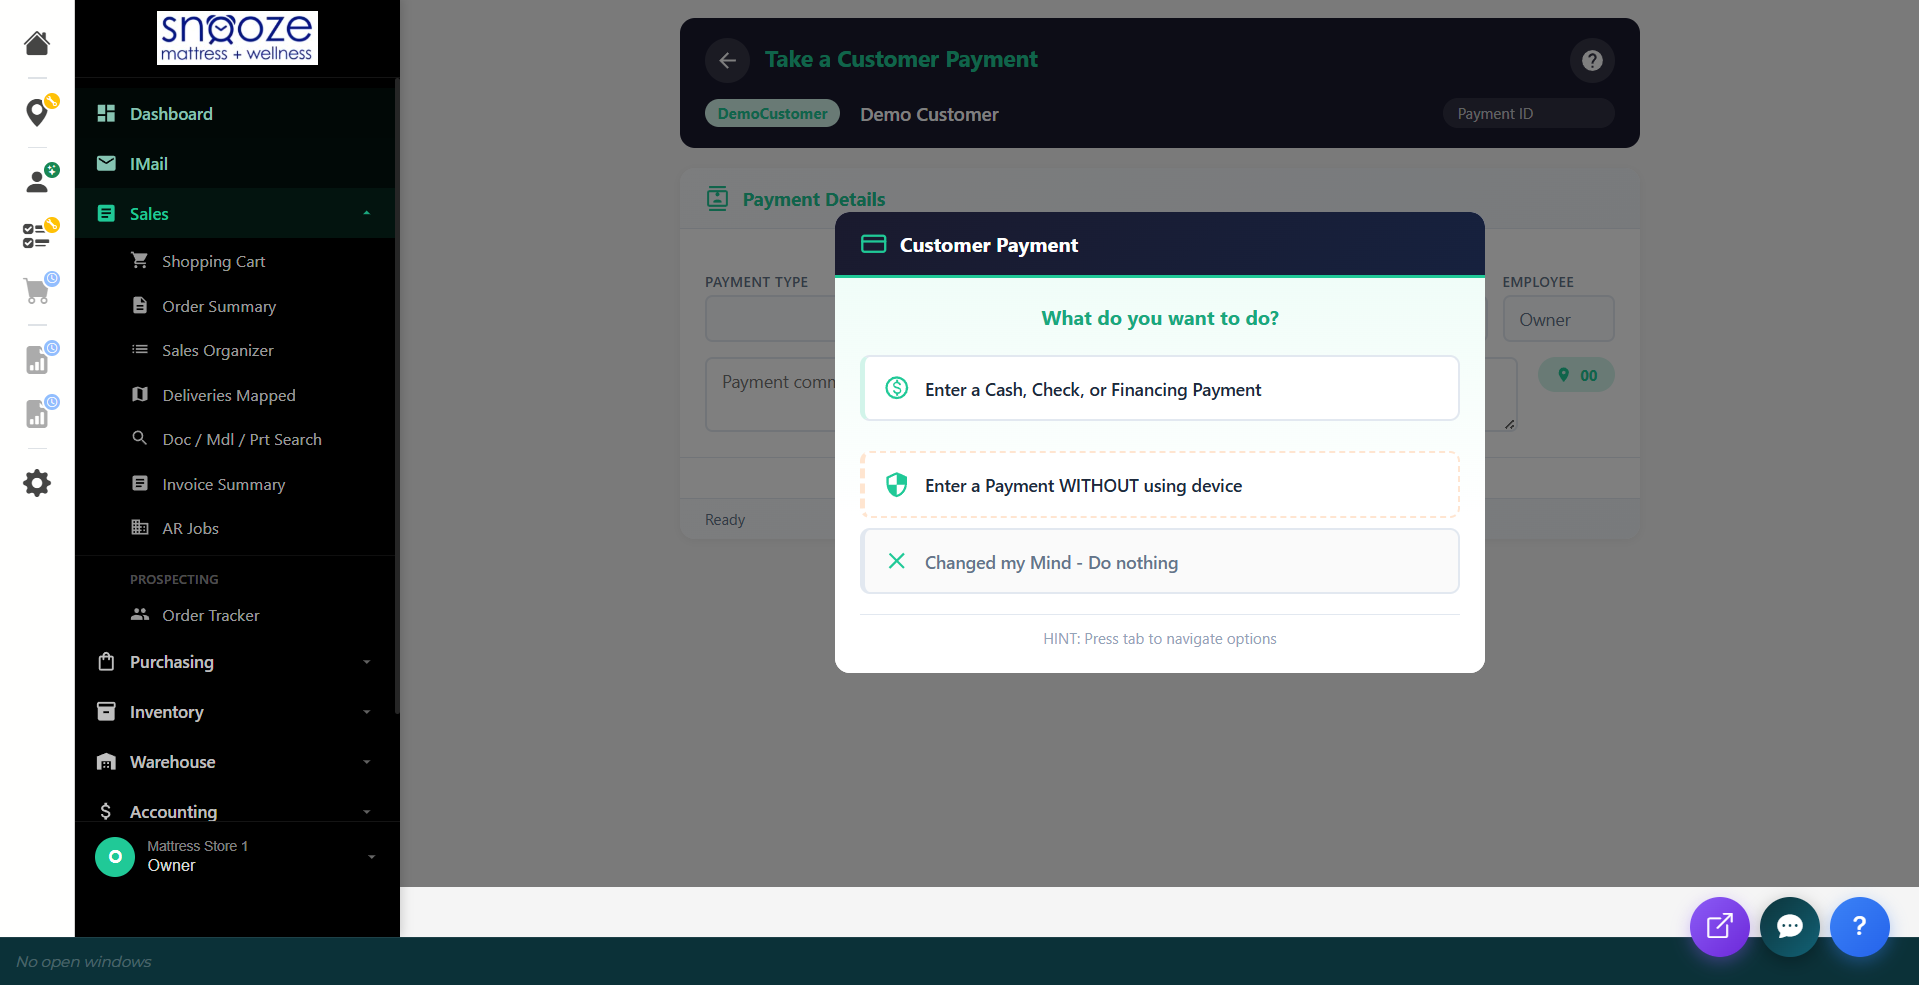
Enter Payment Details
Select the payment method (credit card, cash, financing, etc.), enter the amount, and process the payment. You can take a deposit now and collect the balance on delivery, or take the full amount upfront — follow your store's policy.
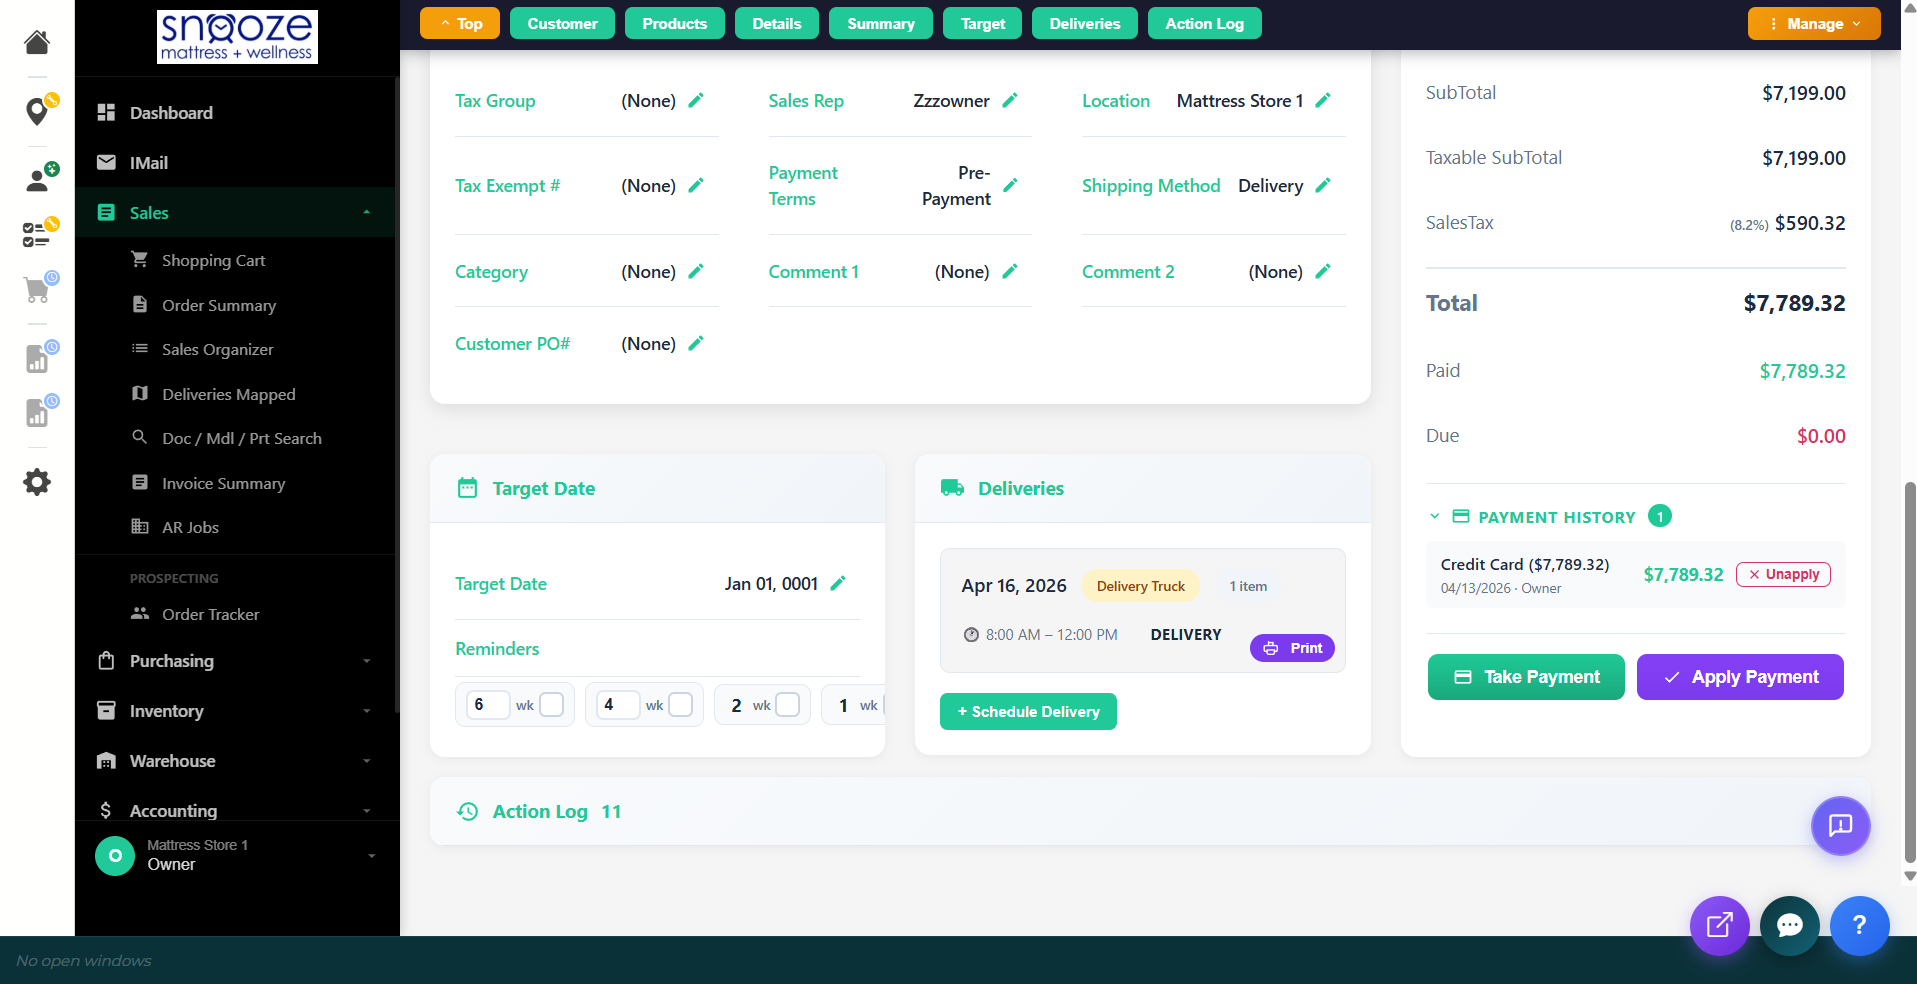
Confirm the Order
Once payment is recorded, verify the order summary: items, delivery date, and payment status. The order is now live and in the fulfillment pipeline.
Checking Delivery Availability
Open Delivery Routing
From the left sidebar, click Sales → Deliveries Mapped. This opens the delivery calendar and routing view.
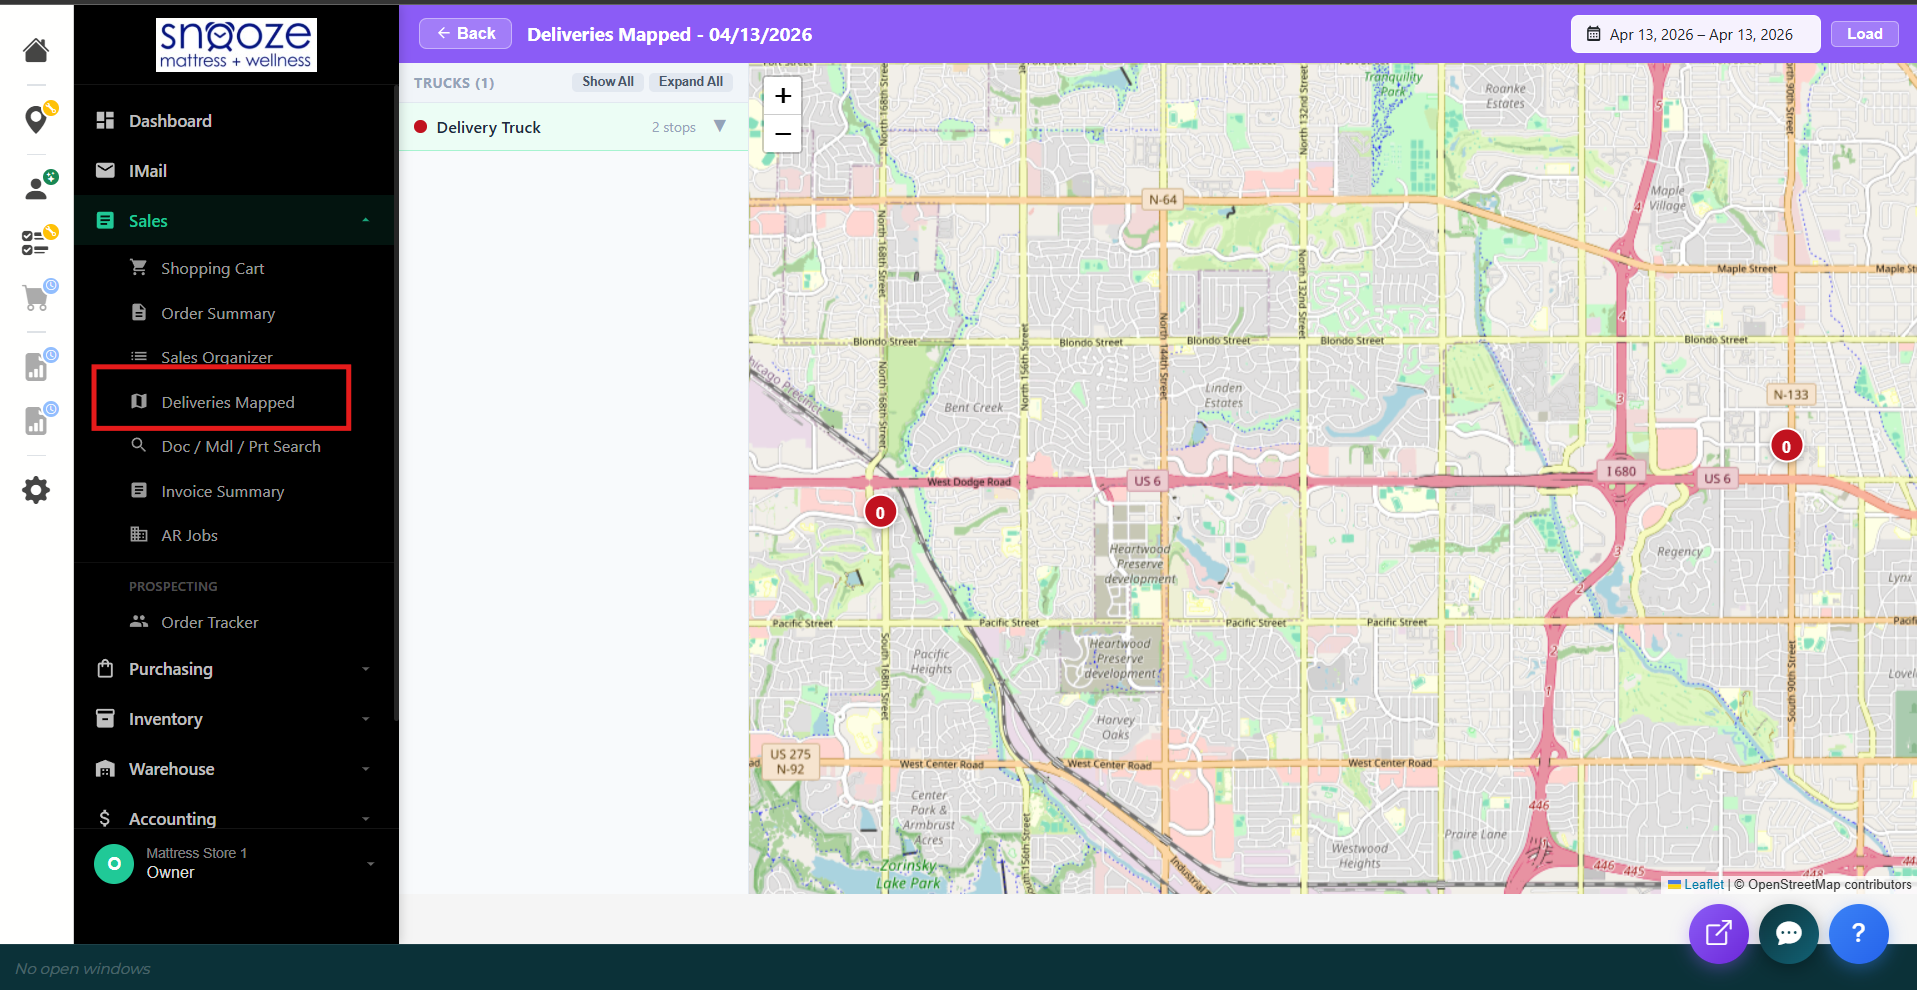
Check Available Delivery Dates
The calendar view shows which dates already have deliveries scheduled and how many stops are on each day. Look for dates with open capacity — days that are not full and that cover the customer's delivery area.
Confirm with the Customer
Based on available dates and the customer's location, give them 2–3 date options. Once they choose, you will set this date when writing up the order (covered in section 4 above).